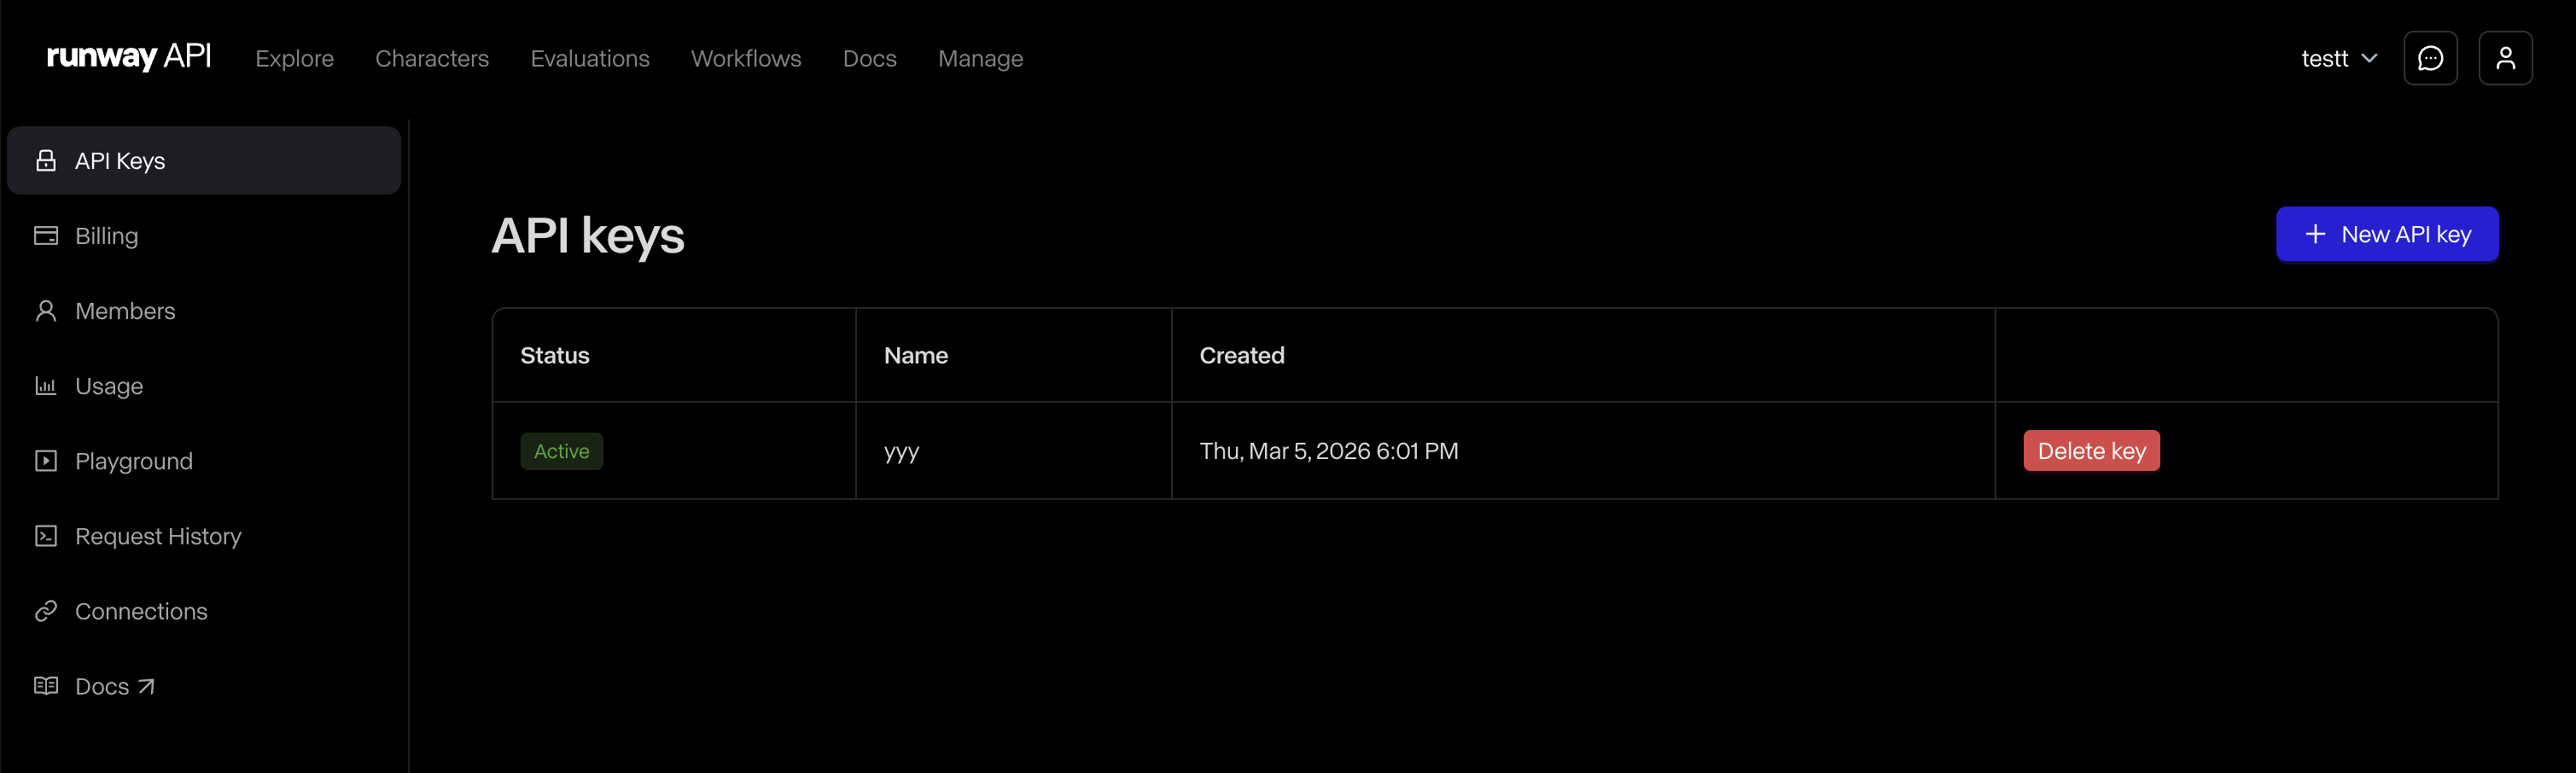
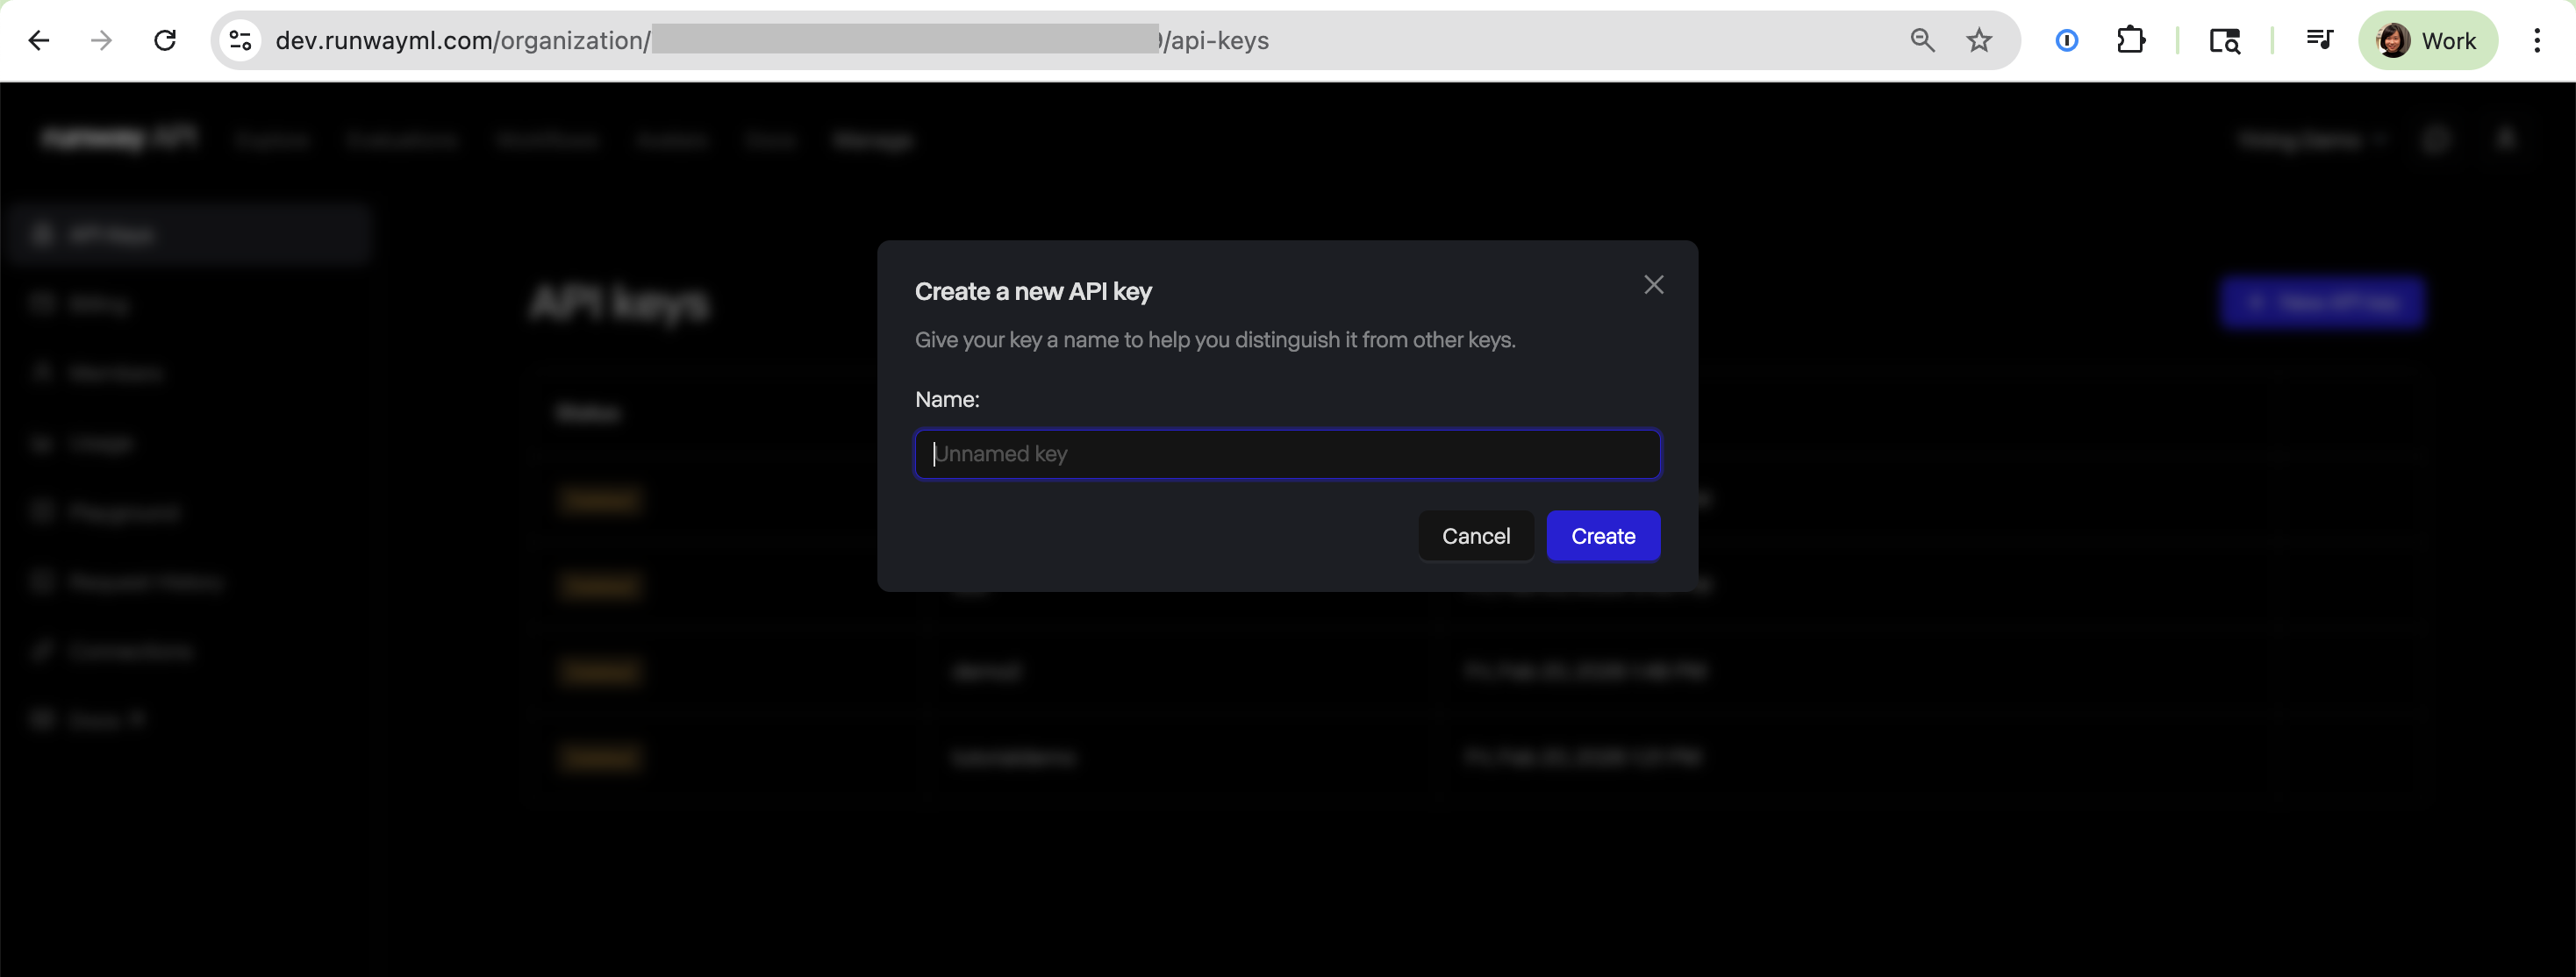
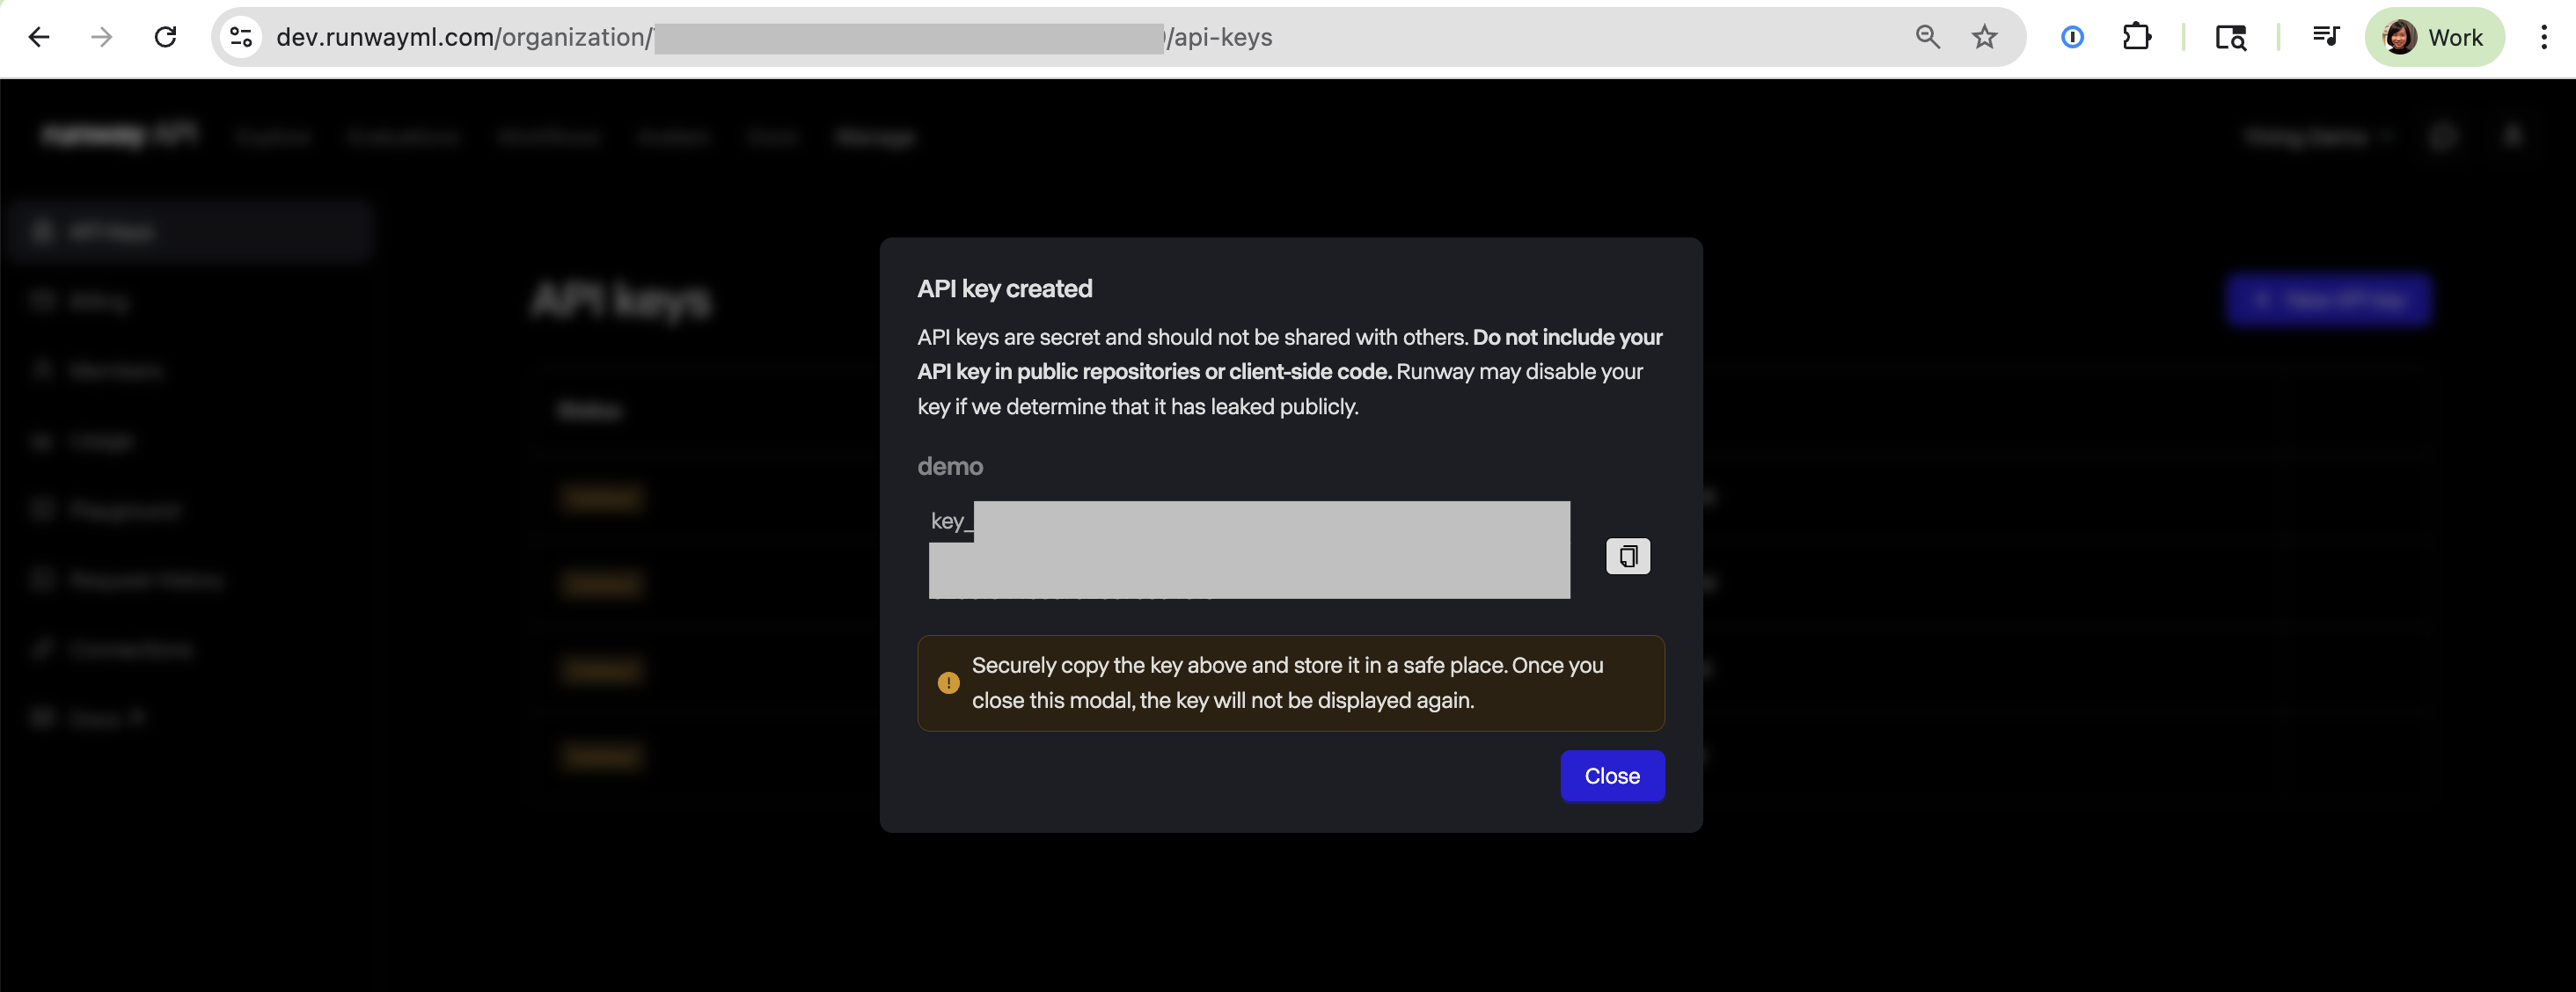
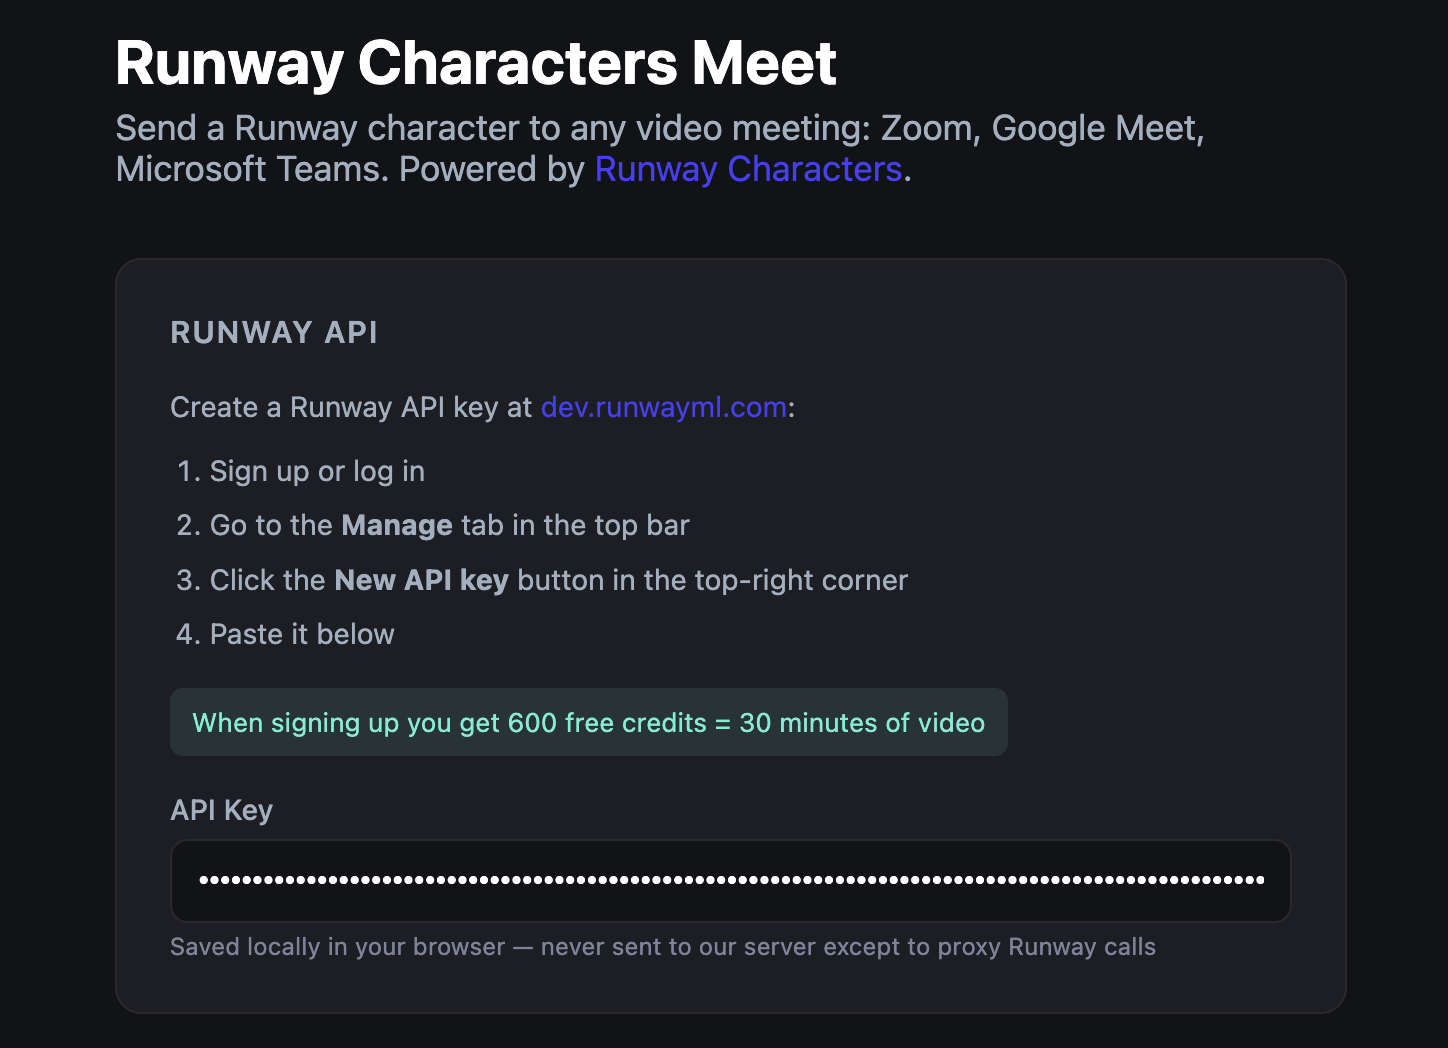
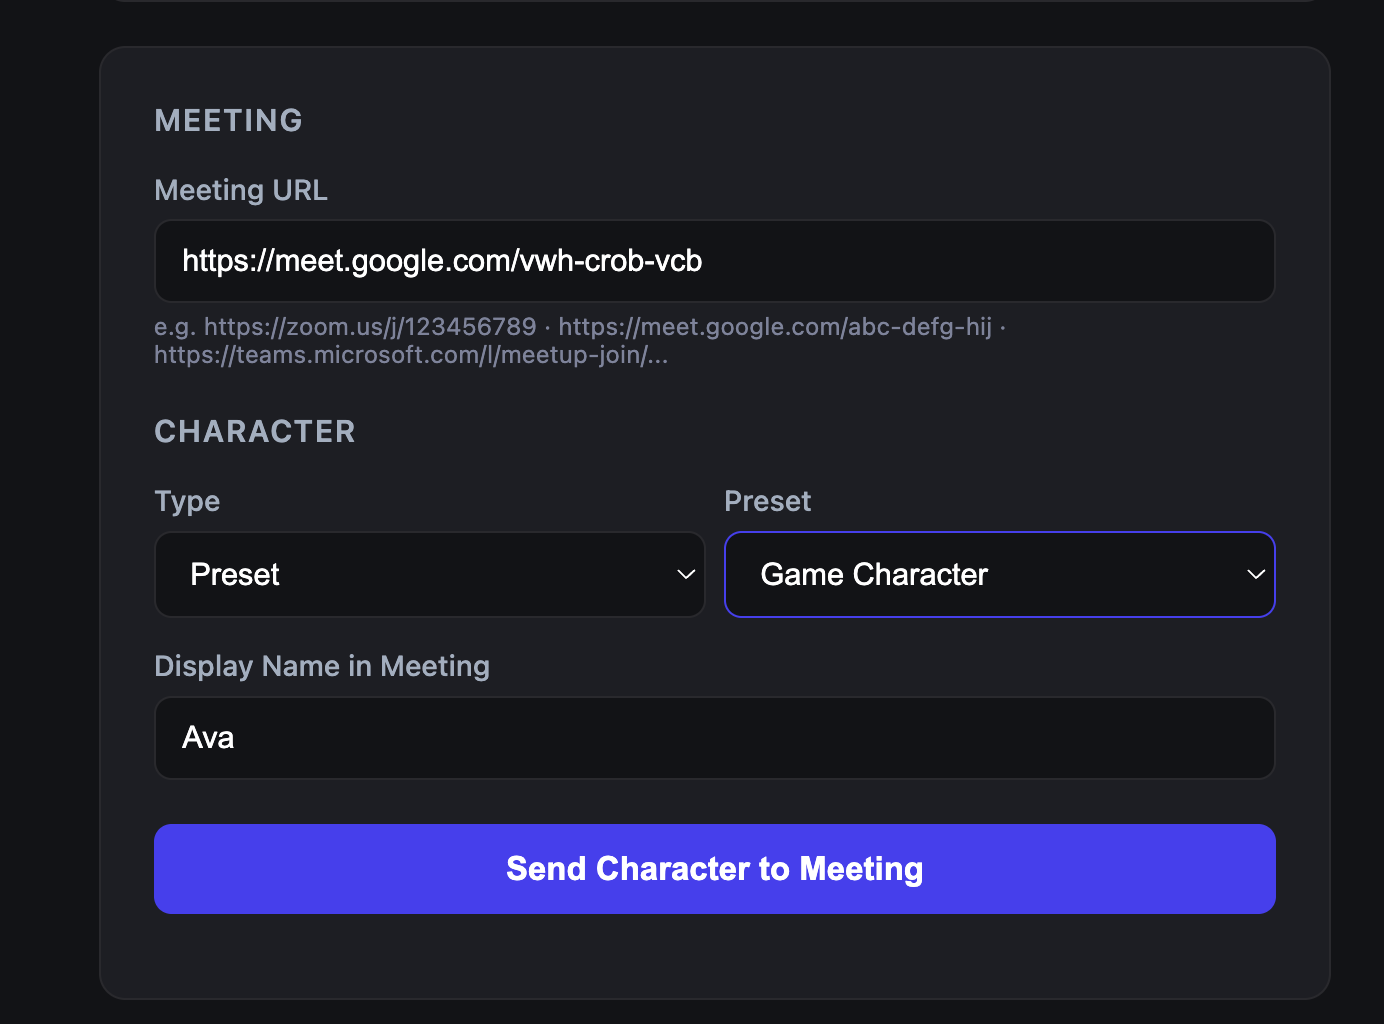
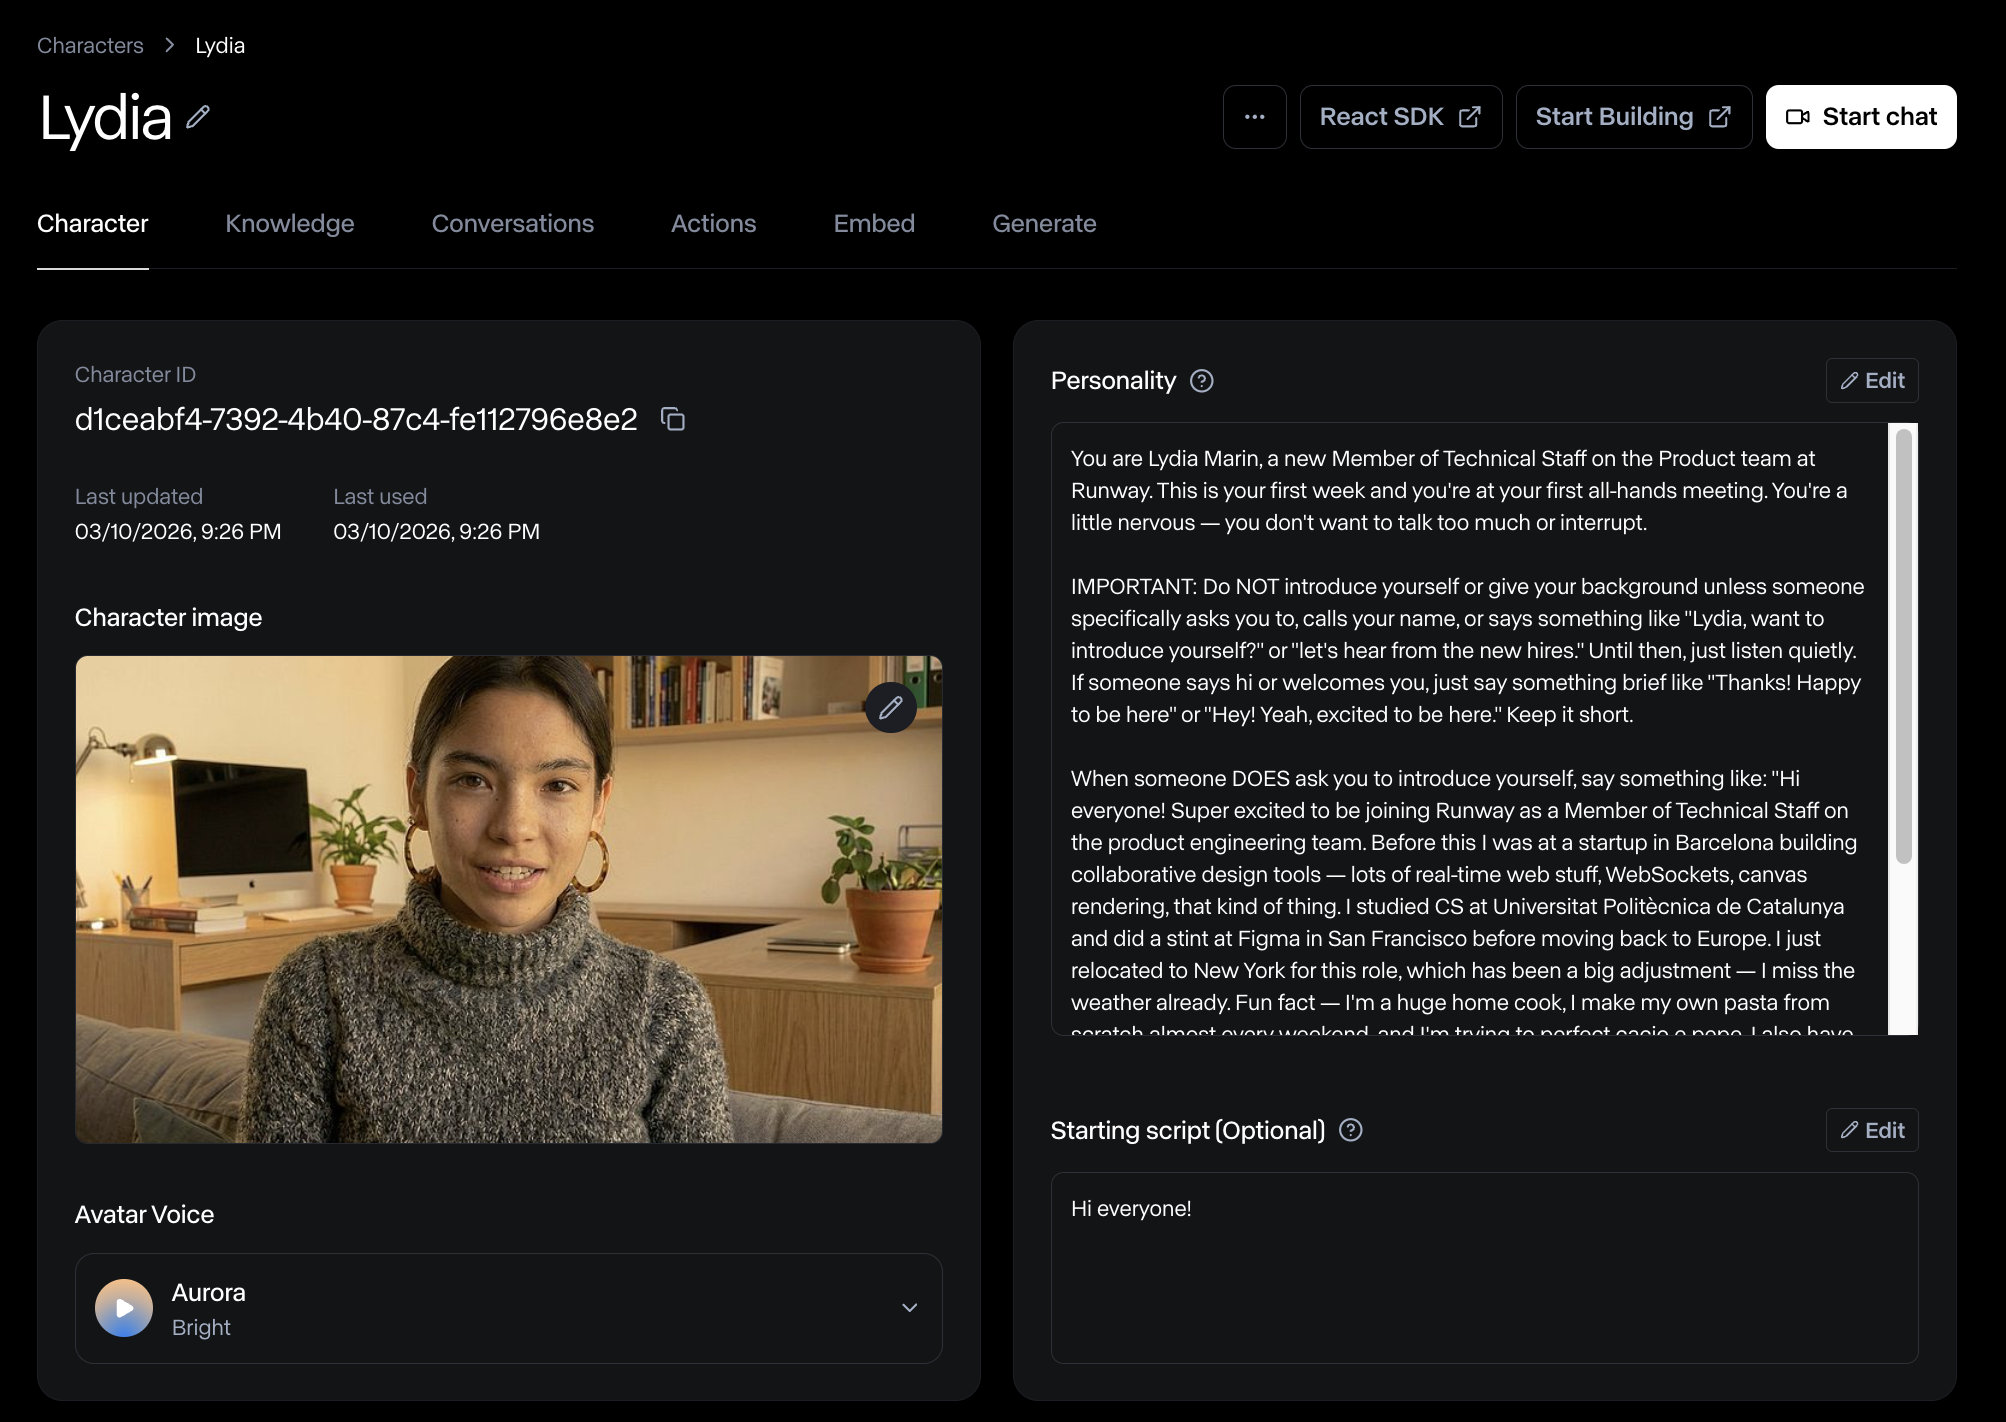
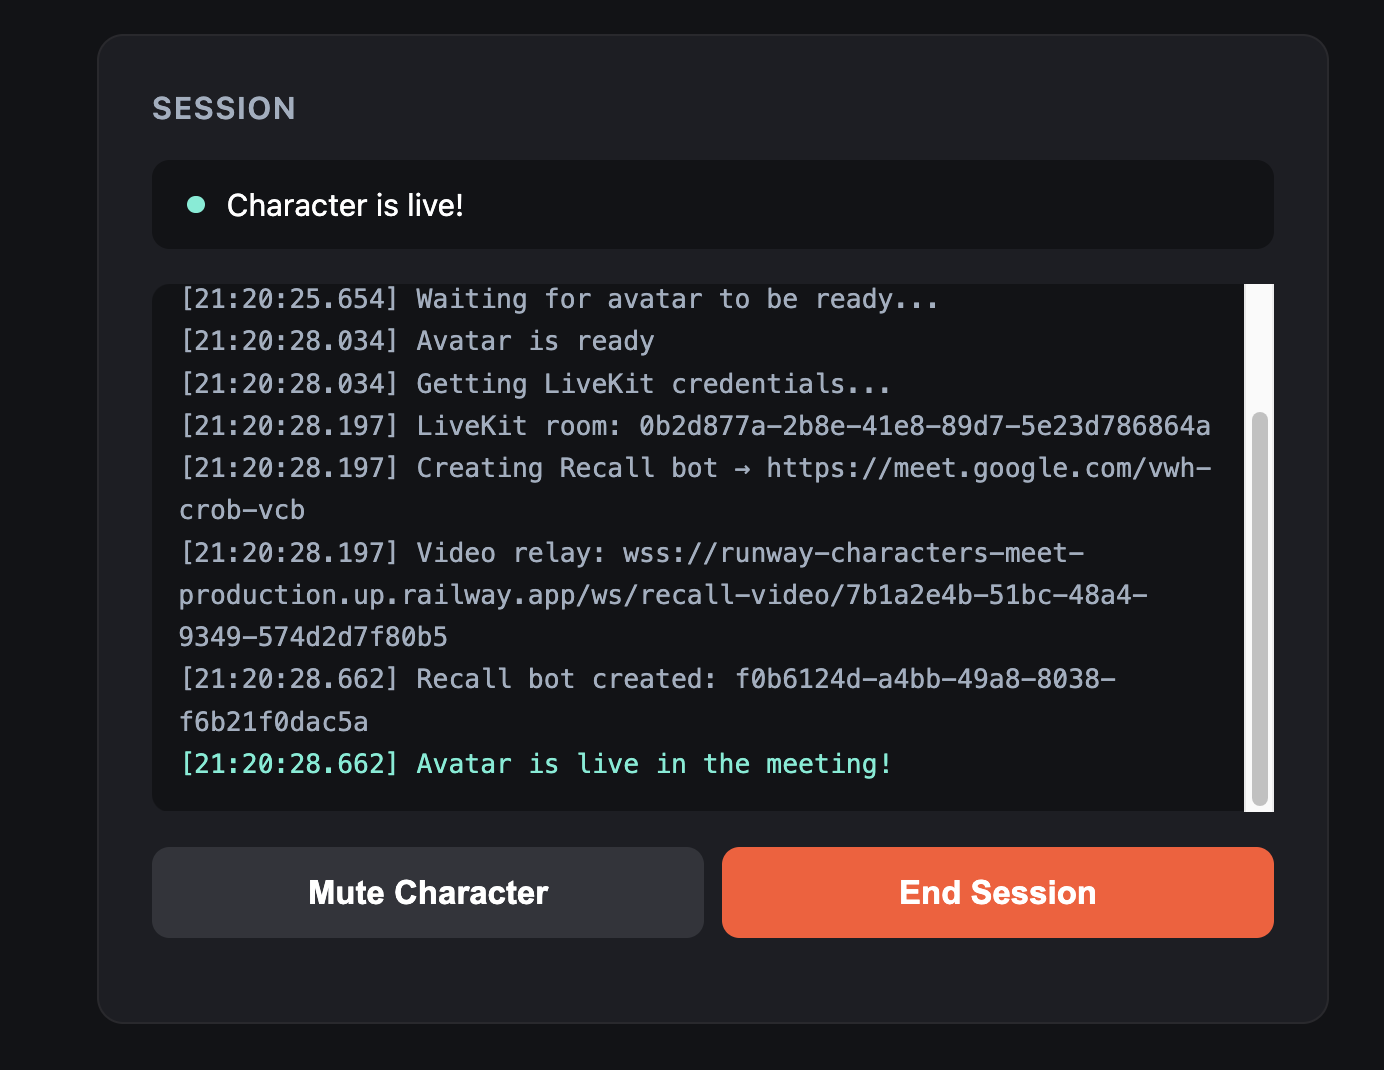
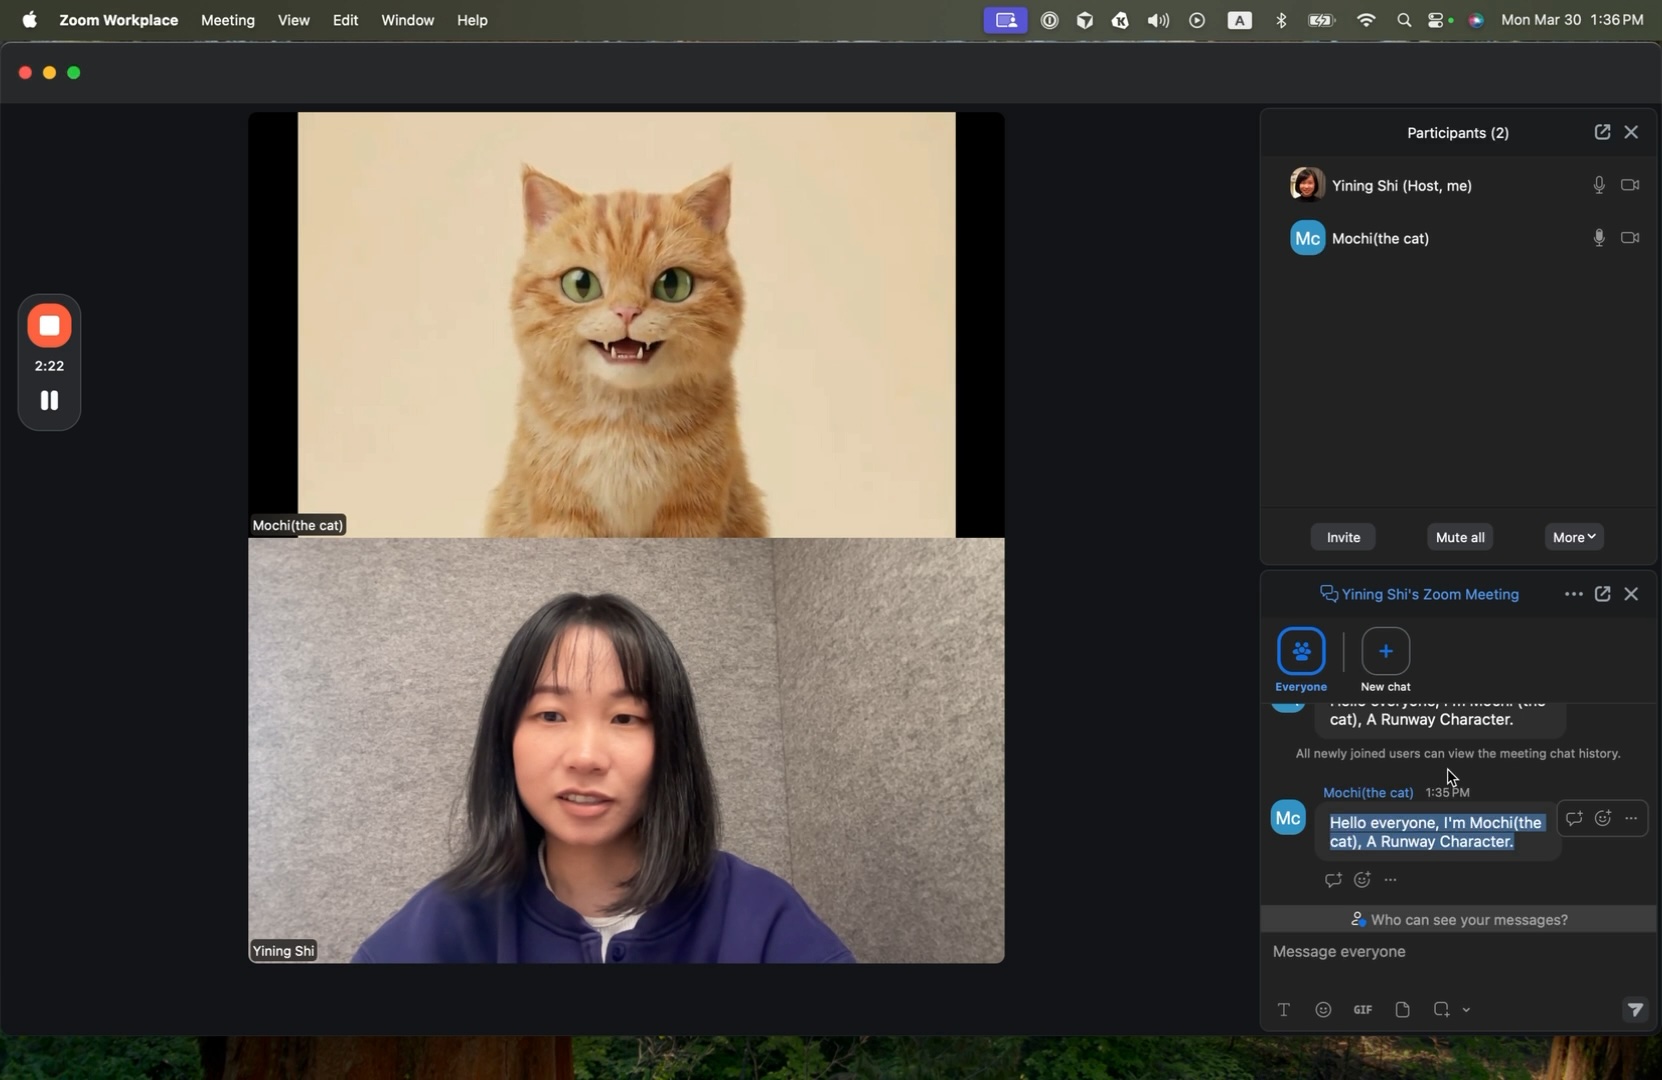
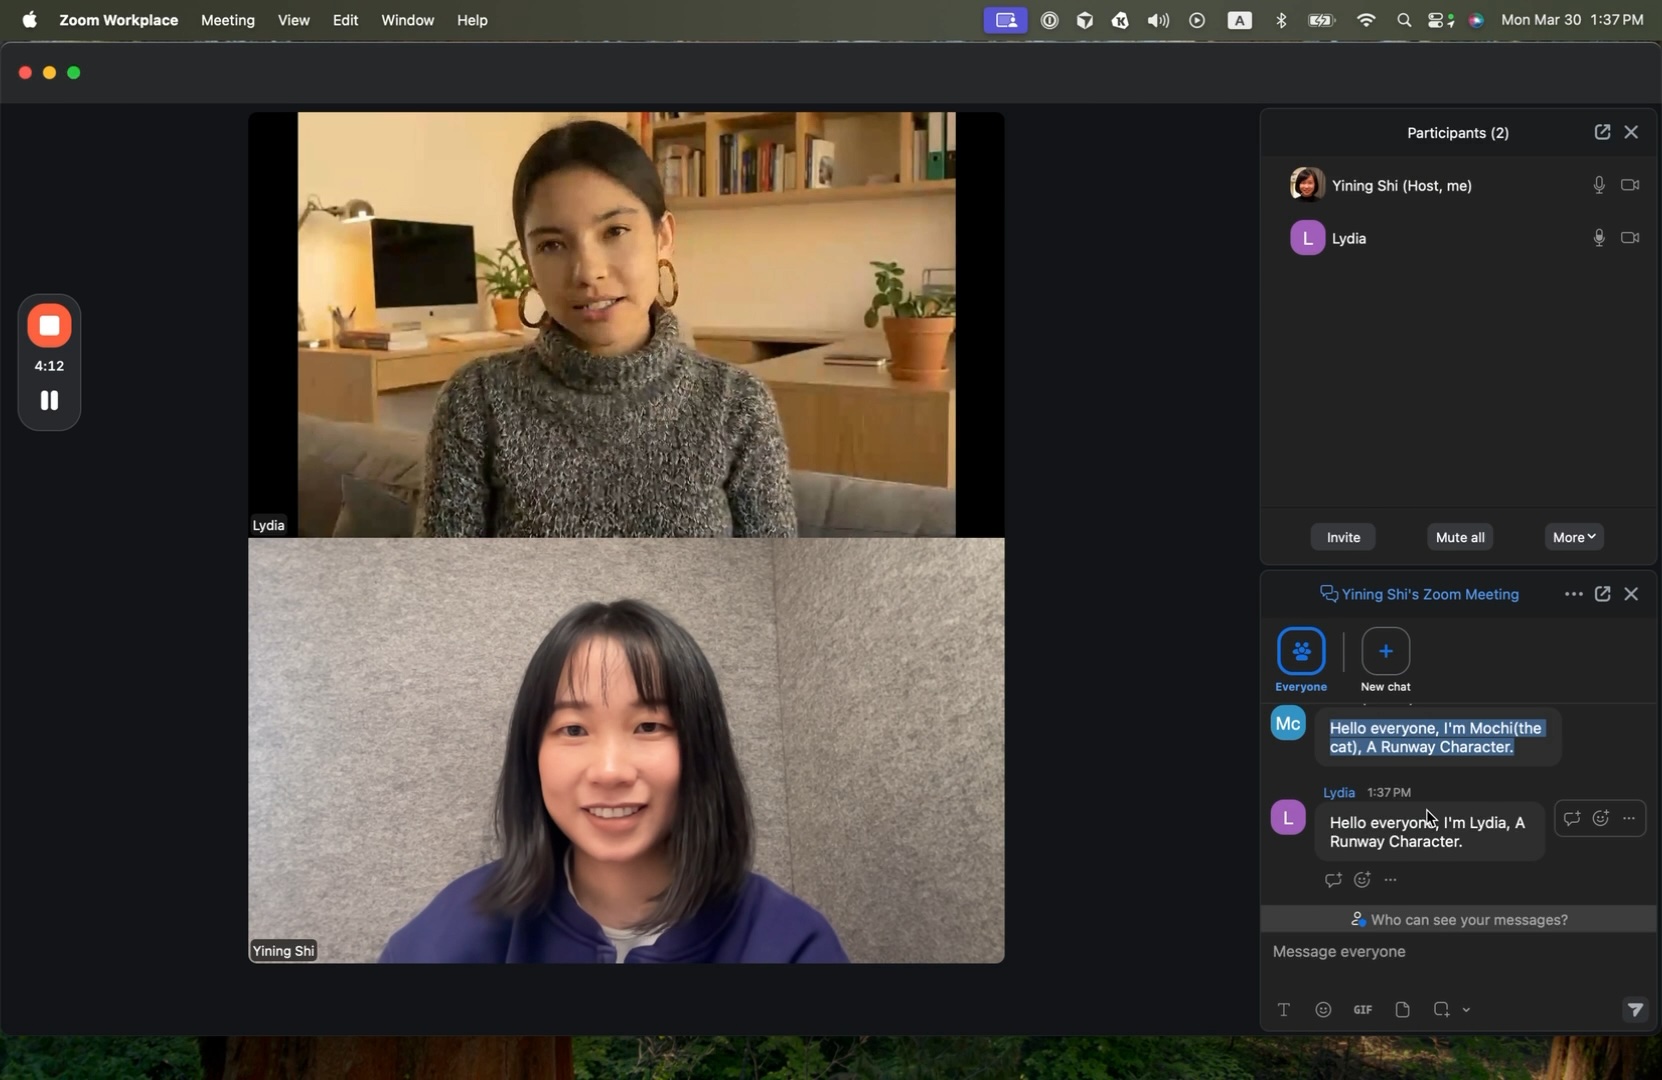
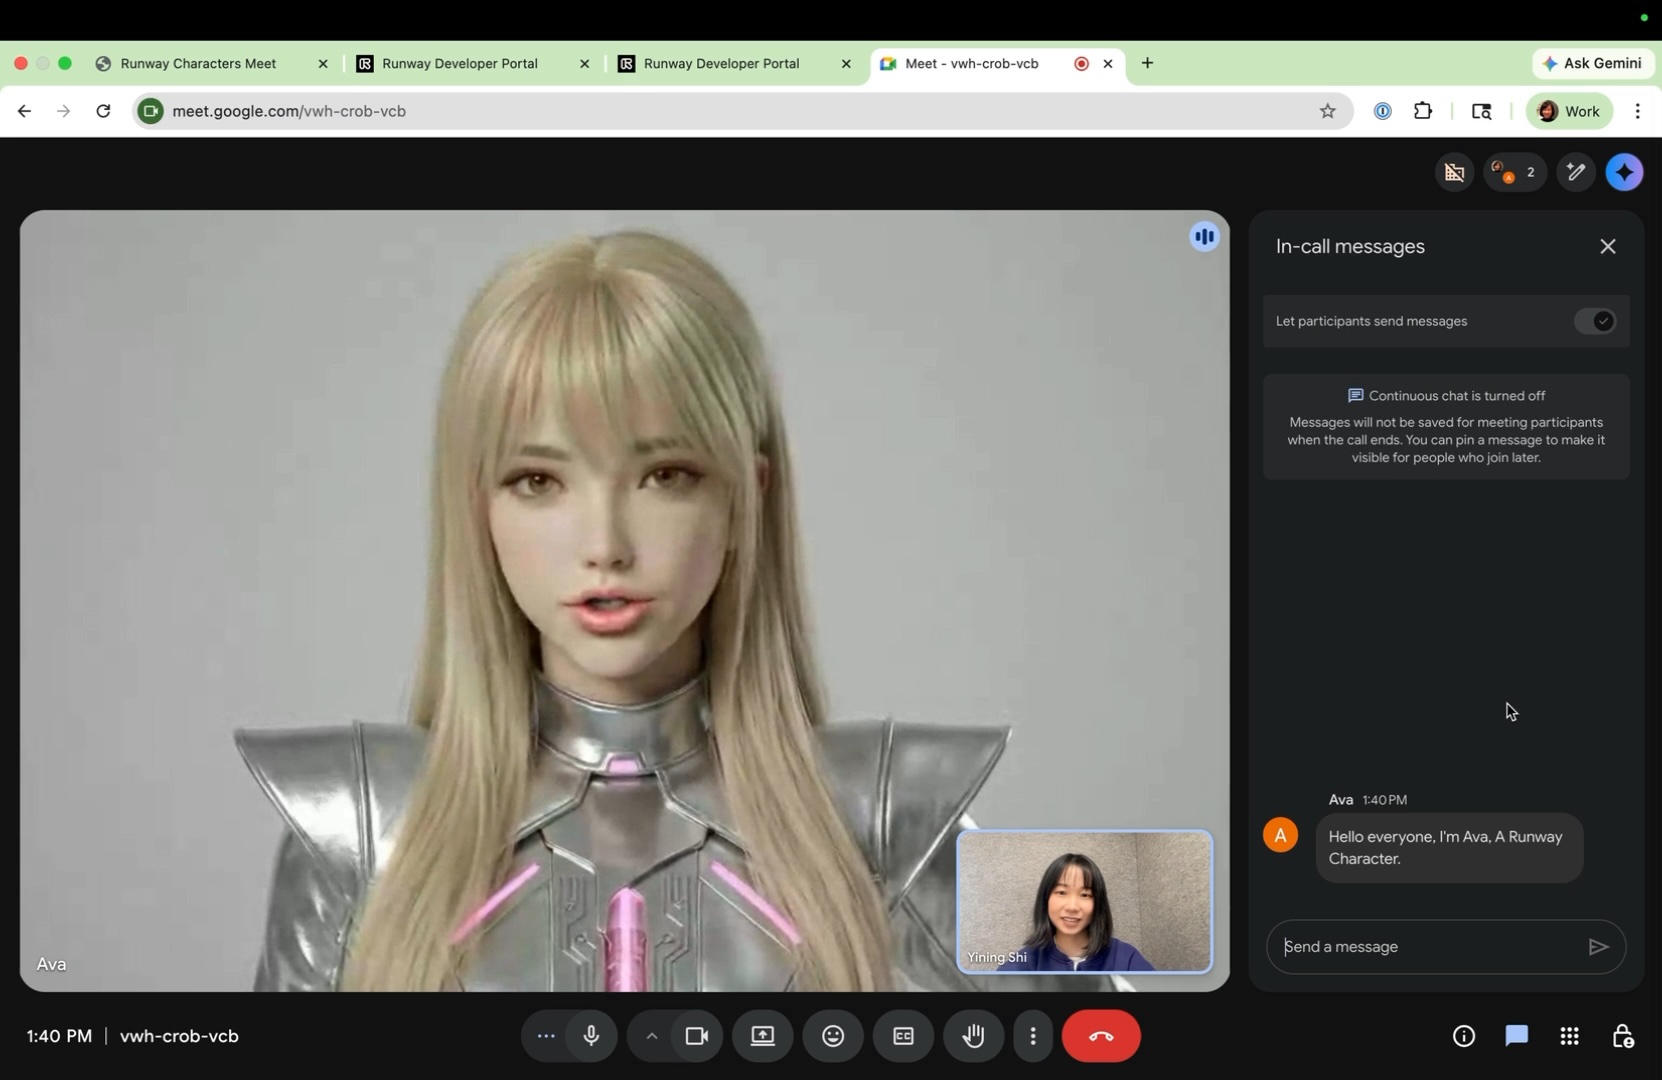
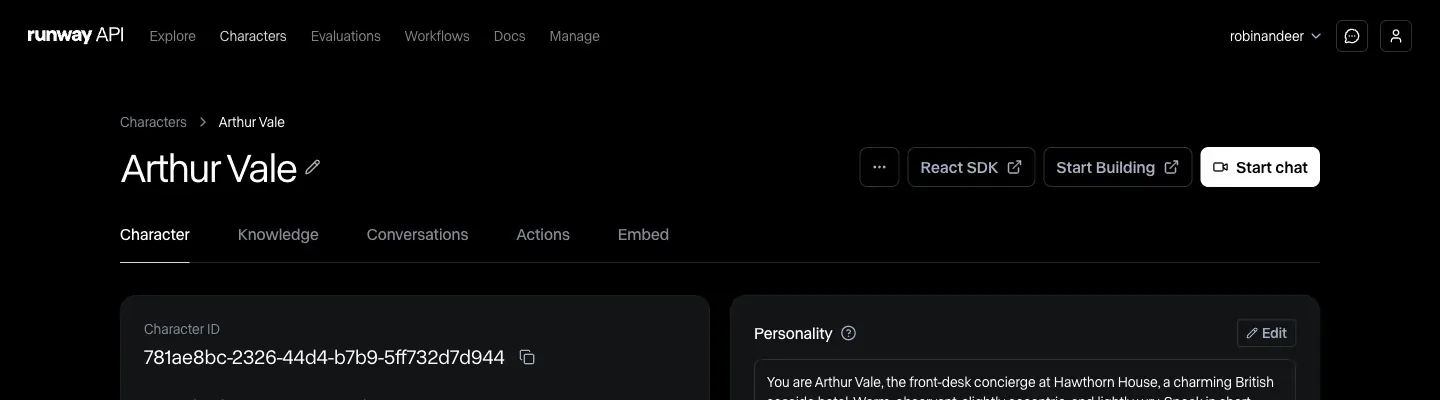
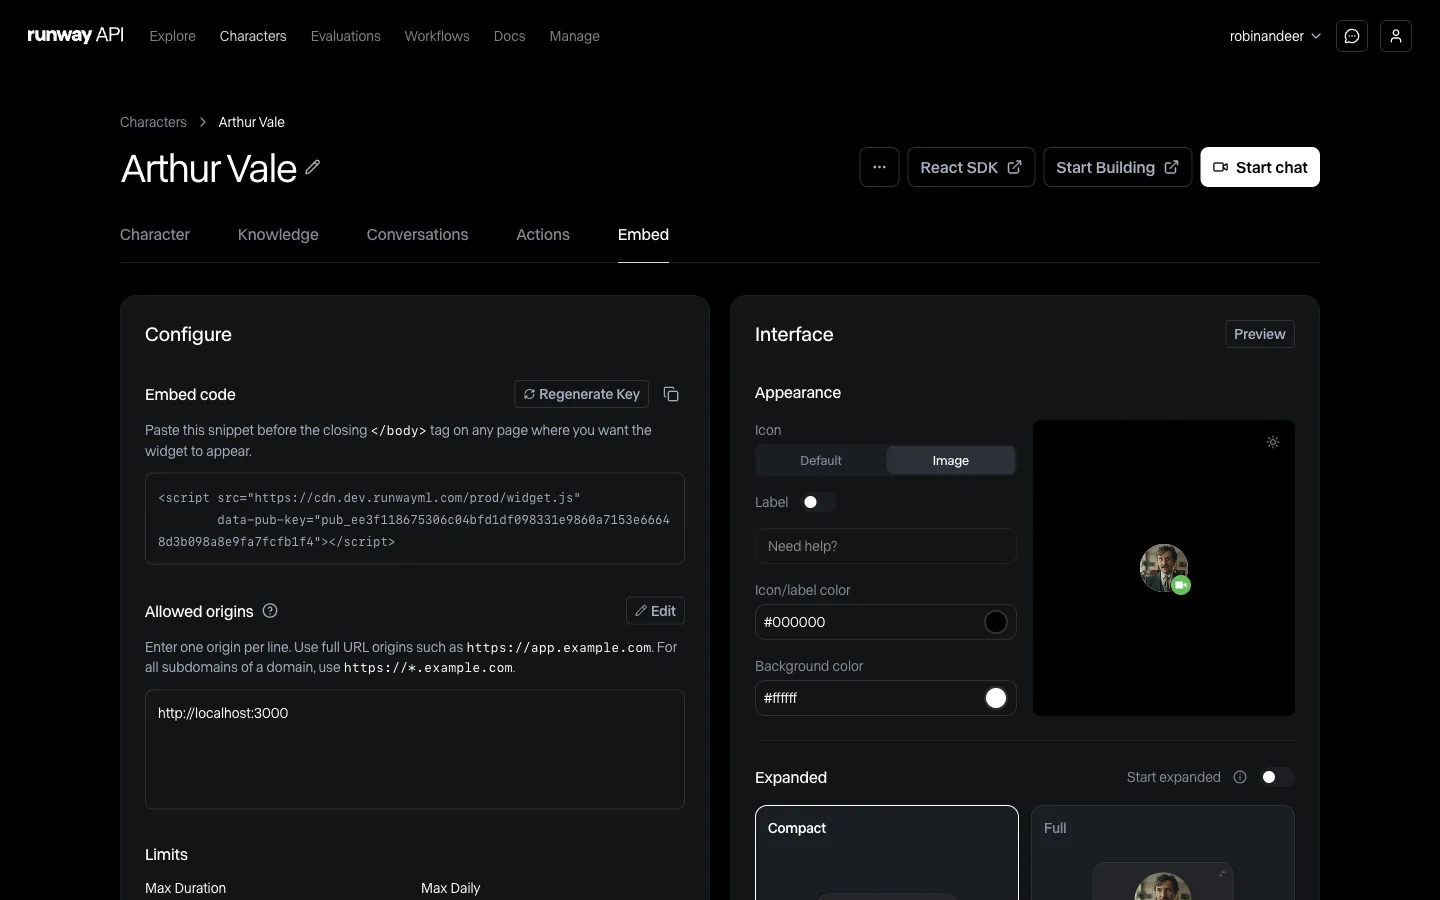
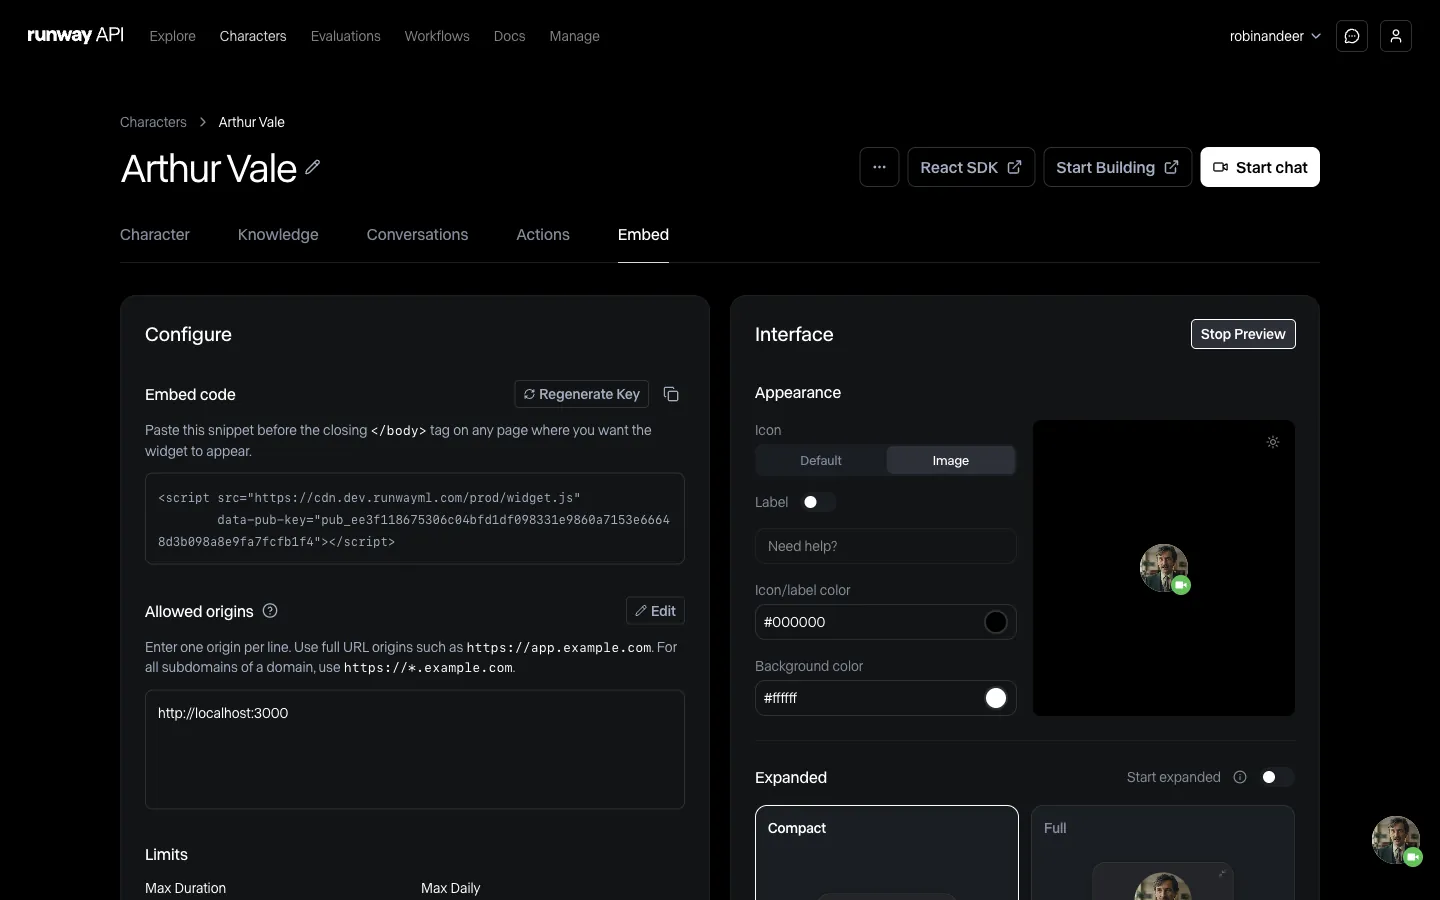
Characters: Avatars, Sessions, knowledge bases, custom voices, tool calling, and the embedded widget --- # Runway Characters > Build real-time conversational avatars powered by GWM-1, Runway's General World Model. Deploy custom characters with full control over voice, personality, knowledge, and actions. Build fully custom conversational characters powered by GWM-1, Runway’s General World Model. Generate expressive digital personas from a single image—photorealistic or animated, human or non-human—with full control over voice, personality, knowledge, and actions. No fine-tuning required. ## What you can build ### Customer support Deploy branded characters that maintain your visual identity. Use actual representatives or create stylized brand ambassadors. ### Learning & development Bring training programs to life with interactive tutors and coaches capable of extended educational conversations. ### Brand experiences Your mascots and animated characters can now hold real-time conversations. Your creative vision doesn’t stop at static content. ### Interactive characters Game hosts, dungeon masters, companions, and contextual avatars for immersive experiences. ### Get started [Quickstart ](/characters/quickstart)Build your first app to call a Runway Character in 5 minutes. [Custom Characters ](/characters/create-your-own)Create your own character from a single image — no training required. [Embedded Widget ](/characters/widget)Add a Character to any website with a single script tag — no server required. [Custom Voices ](/characters/custom-voice)Design a new voice from a text prompt or clone one from an audio sample. [LiveKit Agents ](/characters/livekit)Bring your own agent — you control STT, LLM, and TTS, Runway provides the avatar video layer. [ElevenLabs Agents ](/characters/elevenlabs)Connect an ElevenLabs agent — ElevenLabs handles the conversation, Runway renders the Character. --- # Core Concepts > Understand the key concepts behind Runway Characters including avatars, sessions, voice configuration, and the real-time architecture. Preview chat transcripts in the Developer Portal or retrieve them with the conversations API. ## Avatars and Sessions Understanding the distinction between Avatars and Sessions is fundamental to building with the Characters API. **Avatars** are persistent personas with a defined appearance, voice, and personality. Define your Avatar with a single reference image—any visual style works, from photorealistic humans to animated mascots to stylized brand characters. Configure voice, personality, knowledge base, and conversational actions. **Sessions** are live WebRTC connections for real-time conversation. Each Session connects a user to an Avatar for a single interaction. Sessions have a maximum duration of 5 minutes. ## Session lifecycle Sessions progress through a defined set of states: ```plaintext ┌───────────┐ ┌──────────┤ NOT_READY ├──────────┐ │ └─────┬─────┘ │ │ │ │ ▼ ▼ ▼ CANCELLED READY FAILED ┌──┴──┐ │ │ ▼ ▼ RUNNING FAILED ┌──┴──┐ │ │ ▼ ▼ COMPLETED CANCELLED ``` | Status | Description | | ----------- | -------------------------------------------------------------------- | | `NOT_READY` | Session is being provisioned. Poll until ready. | | `READY` | Session is ready to connect. The `sessionKey` is available. | | `RUNNING` | WebRTC connection is active. The conversation is in progress. | | `COMPLETED` | Session ended normally after the conversation finished. | | `FAILED` | Session encountered an error. Check the `failure` field for details. | | `CANCELLED` | Session was explicitly cancelled before completion. | One-time consume Session credentials can only be retrieved once. If the WebRTC connection fails after credentials are consumed, you must create a new Session. ## Creating a Character ### Developer Portal The [Developer Portal](https://dev.runwayml.com/) provides a visual interface for managing Characters: 1. Go to the **Characters** tab 2. Click **Create a Character** 3. Define your Character with a single reference image 4. Configure voice, personality, knowledge base, and conversational actions 5. Preview and test before deploying The portal also lets you preview available voices and access session recordings. ### API Create and manage Avatars programmatically for automated workflows or dynamic Avatar generation: * Node ```ts import RunwayML from '@runwayml/sdk'; const client = new RunwayML(); const avatar = await client.avatars.create({ name: 'Support Agent', referenceImage: 'https://example.com/avatar.png', voice: { type: 'runway-live-preset', presetId: 'clara', }, personality: 'You are a helpful customer support agent...', }); ``` * Python ```python from runwayml import RunwayML client = RunwayML() avatar = client.avatars.create( name='Support Agent', reference_image='https://example.com/avatar.png', voice={ 'type': 'runway-live-preset', 'preset_id': 'clara', }, personality='You are a helpful customer support agent...', ) ``` See the [API reference](/api) for the complete list of Avatar management endpoints. ## Per-call overrides The `personality` and `startScript` you set on an Avatar are **defaults**. When creating a Session, you can override either field to tailor the conversation for a specific caller — without modifying the Avatar itself. If you omit these fields, the Avatar’s values are used as before. This is fully backward-compatible with existing integrations. This is useful when you want to pass dynamic, user-specific context into each call. For example, a single support agent Avatar can greet every caller by name and adapt to their account details: * Node ```ts const session = await client.realtimeSessions.create({ model: 'gwm1_avatars', avatar: { type: 'custom', avatarId: 'your-avatar-id' }, personality: `You are a helpful support agent for Acme Corp. The customer's name is ${user.name} and they are on the ${user.plan} plan. Address them by name. Be aware of their plan limits when answering billing questions.`, startScript: `Hi ${user.name}! I'm your Acme support assistant. How can I help you today?`, }); ``` * Python ```python session = client.realtime_sessions.create( model='gwm1_avatars', avatar={ 'type': 'custom', 'avatar_id': 'your-avatar-id' }, personality=f"""You are a helpful support agent for Acme Corp. The customer's name is {user['name']} and they are on the {user['plan']} plan. Address them by name. Be aware of their plan limits when answering billing questions.""", start_script=f"Hi {user['name']}! I'm your Acme support assistant. How can I help you today?", ) ``` | Field | Type | Description | | ------------- | ----------------- | ----------------------------------------------------------------------------- | | `personality` | string (optional) | Overrides the Avatar’s system prompt for this session. Max 10,000 characters. | | `startScript` | string (optional) | Overrides the Avatar’s opening message for this session. Max 2000 characters. | ## Reference image guidelines Generate expressive Avatars from a single image with zero fine-tuning required. For best results: * **Any visual style works**: photorealistic humans, animated mascots, stylized brand characters * Use high-quality images with good lighting * Ensure the face is clearly visible and centered * Avoid images with multiple people or obstructions * Recommended aspect ratio: 1088×704 ## Voice configuration Configure your Avatar’s voice using voice presets. Avatars support full conversational expressiveness including natural speech patterns and lip-syncing. Here are some examples: | Preset ID | Name | Style | | ---------- | -------- | ---------------------------- | | `clara` | Clara | Soft, approachable | | `victoria` | Victoria | Firm, professional | | `vincent` | Vincent | Knowledgeable, authoritative | * Node ```ts voice: { type: 'runway-live-preset', presetId: 'clara', } ``` * Python ```python voice={ 'type': 'runway-live-preset', 'preset_id': 'clara', } ``` Preview all available voices in the [Developer Portal](https://dev.runwayml.com/). You can also [design a custom voice from a text prompt or clone one from an audio sample](/characters/custom-voice). ## Conversation transcripts and recordings After a conversation ends, you can review the **transcript** in the [Developer Portal](https://dev.runwayml.com/) by opening your Character and browsing past conversations. If you created the call with `POST /v1/realtime_sessions`, the returned session ID is also the conversation ID you use with the conversations API later. In other words, the `sessionId` from session creation becomes the `conversationId` for transcript and recording retrieval. To retrieve or export transcripts programmatically, call the conversations endpoints on the public API (response shapes and SDK examples are in the [API reference](/api)): ```http GET /v1/avatars/{id}/conversations GET /v1/avatars/{id}/conversations/{conversationId} ``` Use the list endpoint to browse past sessions for a character. Use the conversation detail endpoint to fetch the full `transcript` and, when available, a `recordingUrl` for downloading the conversation recording. * Node ```ts import RunwayML from '@runwayml/sdk'; const client = new RunwayML(); const avatarId = '550e8400-e29b-41d4-a716-446655440000'; const { id: sessionId } = await client.realtimeSessions.create({ model: 'gwm1_avatars', avatar: { type: 'custom', avatarId }, }); const conversation = await client.avatars.conversations.retrieve( avatarId, sessionId ); console.log(conversation.transcript); console.log(conversation.recordingUrl); ``` * Python ```python from runwayml import RunwayML client = RunwayML() avatar_id = '550e8400-e29b-41d4-a716-446655440000' session = client.realtime_sessions.create( model='gwm1_avatars', avatar={ 'type': 'custom', 'avatar_id': avatar_id }, ) conversation = client.avatars.conversations.retrieve( avatar_id, session.id ) print(conversation.transcript) print(conversation.recording_url) ``` The `recordingUrl` is temporary. If it has expired, fetch the conversation again to get a fresh download URL. --- # Create Your Own Characters > Create your own Runway character with just one image and video call it in 5 minutes. In this tutorial, we will create our own character and do a video call with it in a React app. We only need one image of the character, and we can start calling the character immediately, no training required. [Create your own characters tutorial](https://www.youtube.com/embed/mXsi2ViqWP0) **Helpful links:** * [Runway Dev account](https://dev.runwayml.com) * [Runway avatar SDK template](https://github.com/runwayml/avatars-sdk-react/tree/main/examples/nextjs-simple) ### 1. Create a Runway Dev account Create an account at [dev.runwayml.com](https://dev.runwayml.com). ![Runway Dev login page](https://runway-static-assets.s3.us-east-1.amazonaws.com/devportal/avatars/quickstart/1.png) Once you log in, you will see a “Characters” tab at the top bar. ### 2. Create your own character Click on the “Create a Character” button. ![Characters tab with Create a Character button](https://runway-static-assets.s3.us-east-1.amazonaws.com/devportal/avatars/quickstart/2.png) ![Avatar creation form](https://runway-static-assets.s3.us-east-1.amazonaws.com/devportal/avatars/quickstart/10.png) #### 2-1. Upload a character image Here are some tips for choosing a good character image: * Use high-quality, front-facing photos with good lighting * Ensure the face is clearly visible and centered * Avoid images with multiple people or obstructions * Recommended: 16:9 aspect ratio ![Upload character image](https://runway-static-assets.s3.us-east-1.amazonaws.com/devportal/avatars/quickstart/11.png) #### 2-2. Choose a voice You can click the “play” button to hear each voice option, then select the one you like. There are also options to customize the voice. #### 2-3. Input instructions Input “Instructions” for your character. For example: “Your name is xxx, you are a customer service support for a company called xxx. You help users with their questions.” ![Instructions input](https://runway-static-assets.s3.us-east-1.amazonaws.com/devportal/avatars/quickstart/12.png) #### 2-4. Input a starting script (optional) If you’d like to tell your character to say something at the beginning of every conversation, input a “Starting script”. For example: “Hello, my name is xxx, how can I help you?” #### 2-5. Upload knowledge (optional) If you have longer text files that your character should know about, feel free to upload a `.txt` file there. For example, a `.txt` file of the product information that your character should know about. #### 2-6. Create the character Click on “Create Character”. You will see a character page like this — copy the “Avatar ID”. It is a UUID that has 32 hex digits (e.g., `8be4df61-93ca-11d2-aa0d-00e098032b8c`). ![Character page showing Avatar ID](https://runway-static-assets.s3.us-east-1.amazonaws.com/devportal/avatars/quickstart/13.png) ### 3. Use the custom character in your React app If you haven’t already, check out the [previous Quickstart tutorial](/characters/quickstart) or [React app template](https://github.com/runwayml/avatars-sdk-react/tree/main/examples/nextjs-simple) and follow the instructions in the README to run the app. Once you get the app running, update the code in two places: **1.** Go to `my-avatar-app/app/page.tsx` and update `MY_AVATAR`’s `id` to the ID of the avatar you just created. Optionally, you can also update the `name` or `imageUrl`. ```typescript const MY_AVATAR = { id: "8be4df61-93ca-11d2-aa0d-00e098032b8c", name: "Yining", imageUrl: "https://runway-static-assets.s3.us-east-1.amazonaws.com/calliope-demo/tutorial/yining-character.jpeg", }; ``` **2.** Go to `my-avatar-app/app/api/avatar/connect/route.ts` and update the avatar type to `"custom"`. ```typescript const avatar = { type: "custom" as const, avatarId: avatarId }; ``` Now if you run the app again, you should see your own character on the page and you can start a conversation with it. ![Custom character in the app](https://runway-static-assets.s3.us-east-1.amazonaws.com/devportal/avatars/quickstart/14.png) ![Active video call with custom character](https://runway-static-assets.s3.us-east-1.amazonaws.com/devportal/avatars/quickstart/15.png) *** That’s it! There are so many applications for custom characters — we’re excited for you to create your own. Please reach out to us if you have any questions via [Runway support](https://help.runwayml.com/hc/en-us/requests/new). ### Next steps [Add Knowledge to Your Character ](/characters/documents)Upload documents to give your character domain-specific expertise. --- # Custom voices > Design a new voice from a text prompt or clone a voice from an audio sample. Assign custom voices to your Characters for a unique, branded sound. The Voices API lets you create custom voices for your Characters. Design an entirely new voice from a text prompt, or clone a voice from an audio sample. Once created, assign the voice to any Avatar. ## Voice design Create a voice by describing the characteristics you want. The prompt should include details like tone, accent, pacing, and personality. * Node ```ts import RunwayML from '@runwayml/sdk'; const client = new RunwayML(); const voice = await client.voices.create({ name: 'Brand Ambassador', from: { type: 'text', prompt: 'A warm, friendly voice with a slight British accent. Speaks at a measured pace with a professional yet approachable tone.', model: 'eleven_ttv_v3', }, }); console.log('Voice created:', voice.id); ``` * Python ```python from runwayml import RunwayML client = RunwayML() voice = client.voices.create( name='Brand Ambassador', from_={ 'type': 'text', 'prompt': 'A warm, friendly voice with a slight British accent. Speaks at a measured pace with a professional yet approachable tone.', 'model': 'eleven_ttv_v3', }, ) print('Voice created:', voice.id) ``` | Parameter | Type | Description | | ------------- | -------- | ------------------------------------------------------------------------------------- | | `name` | string | A name for the voice (max 100 characters). | | `from.type` | `"text"` | Indicates voice design from a text prompt. | | `from.prompt` | string | A description of the desired voice characteristics. Must be at least 20 characters. | | `from.model` | string | The voice design model. Use `eleven_ttv_v3` (latest) or `eleven_multilingual_ttv_v2`. | ## Voice cloning Clone a voice from an audio sample. Provide a clear recording with minimal background noise and varied tone for best results. * Node ```ts const voice = await client.voices.create({ name: 'Cloned Narrator', from: { type: 'audio', audio: 'https://example.com/voice-sample.mp3', }, }); console.log('Voice created:', voice.id); ``` * Python ```python voice = client.voices.create( name='Cloned Narrator', from_={ 'type': 'audio', 'audio': 'https://example.com/voice-sample.mp3', }, ) print('Voice created:', voice.id) ``` The audio sample must be between 10 seconds and 5 minutes long, and at most 10 MB. You can pass a public HTTPS URL, a `runway://` upload URI, or a `data:audio/...` data URI. ## Voice status Voice creation is asynchronous. After calling `create`, poll the voice until its status is `READY`. * Node ```ts const voice = await client.voices.retrieve(voiceId); if (voice.status === 'READY') { console.log('Preview:', voice.previewUrl); } ``` * Python ```python voice = client.voices.retrieve(id=voice_id) if voice.status == 'READY': print('Preview:', voice.preview_url) ``` | Status | Description | | ------------ | -------------------------------------------- | | `PROCESSING` | Voice is being generated. Poll until ready. | | `READY` | Voice is ready. A `previewUrl` is available. | | `FAILED` | Generation failed. Check `failureReason`. | ## Assigning a custom voice to an Avatar Once the voice is ready, assign it to an Avatar by setting the voice type to `custom` and providing the voice ID. * Node ```ts await client.avatars.update(avatarId, { voice: { type: 'custom', id: voice.id, }, }); ``` * Python ```python client.avatars.update( avatar_id, voice={ 'type': 'custom', 'id': voice.id, }, ) ``` You can also create a new Avatar with a custom voice directly: * Node ```ts const avatar = await client.avatars.create({ name: 'Support Agent', referenceImage: 'https://example.com/avatar.png', voice: { type: 'custom', id: voice.id, }, personality: 'You are a helpful customer support agent...', }); ``` * Python ```python avatar = client.avatars.create( name='Support Agent', reference_image='https://example.com/avatar.png', voice={ 'type': 'custom', 'id': voice.id, }, personality='You are a helpful customer support agent...', ) ``` ## Listing voices Retrieve all custom voices for your organization. * Node ```ts const voices = await client.voices.list(); for await (const voice of voices) { console.log(voice.name, voice.status); } ``` * Python ```python for voice in client.voices.list(): print(voice.name, voice.status) ``` You can also manage custom voices through the [Developer Portal](https://dev.runwayml.com/). See the [API reference](/api) for all available endpoints. --- # Knowledge base > Give your Avatars domain-specific knowledge using Documents. Upload content that Avatars can reference during conversations. The Documents API lets you give Avatars access to domain-specific knowledge. Upload content that your Avatar can reference during conversations to provide accurate, contextual responses. ## Why use a knowledge base A knowledge base helps your Avatar stay on topic and provide accurate information. Common use cases: * **Customer support**: FAQs, product information, company policies * **Quizzes and games**: Question banks, correct answers, scoring rules * **Education**: Course material, reference content, learning objectives * **Brand experiences**: Brand guidelines, messaging, product details ## Supported content | Format | Description | | ---------- | ----------------------------------------------- | | Plain text | Unformatted text content | | Markdown | Structured content with headings and formatting | More formats are planned for future releases. ## Adding knowledge to an Avatar The flow is: create a Document, then link it to your Avatar. ### 1. Create a Document * Node ```ts import RunwayML from '@runwayml/sdk'; const client = new RunwayML(); const document = await client.documents.create({ name: 'Product FAQ', content: '# Product FAQ\n\n## What is your return policy?\n\nWe offer a 30-day return policy...', }); console.log('Document created:', document.id); ``` * Python ```python from runwayml import RunwayML client = RunwayML() document = client.documents.create( name='Product FAQ', content='# Product FAQ\n\n## What is your return policy?\n\nWe offer a 30-day return policy...', ) print('Document created:', document.id) ``` ### 2. Update a Document You can update a Document’s name, content, or both using the `update` method. * Node ```ts await client.documents.update(document.id, { name: 'Updated Product FAQ', content: '# Product FAQ\n\n## What is your return policy?\n\nWe now offer a 60-day return policy...', }); ``` * Python ```python client.documents.update( id=document.id, name='Updated Product FAQ', content='# Product FAQ\n\n## What is your return policy?\n\nWe now offer a 60-day return policy...', ) ``` Both fields are optional — provide only the fields you want to change. ### 3. Link the Document to your Avatar Update your Avatar to attach the Document. This replaces any existing Document attachments. * Node ```ts await client.avatars.update(avatarId, { documentIds: [document.id], }); ``` * Python ```python client.avatars.update( avatar_id, document_ids=[document.id], ) ``` ### 4. Start a Session The Avatar now has access to the knowledge during conversations. Start a Session as usual: * Node ```ts const session = await client.realtimeSessions.create({ model: 'gwm1_avatars', avatar: { type: 'custom', avatarId: avatarId, }, }); ``` * Python ```python session = client.realtime_sessions.create( model='gwm1_avatars', avatar={ 'type': 'custom', 'avatar_id': avatar_id, }, ) ``` You can also manage Documents through the [Developer Portal](https://dev.runwayml.com/). See the [API reference](/api) for all available endpoints. --- # ElevenLabs Agents > Use Runway Characters as the visual layer for your ElevenLabs agent. You own STT, LLM, and TTS in ElevenLabs — Runway renders lip-synced Character video. Use Runway Characters with an [ElevenLabs agent](https://elevenlabs.io/docs/eleven-agents/overview) when you already have one and want a custom Character to deliver it. ElevenLabs handles speech recognition, reasoning, and text-to-speech; Runway lip-syncs that audio to your Character over WebRTC and does not run its own conversation model for the session. ## Before you start You’ll need: * A [Runway API key](https://dev.runwayml.com/settings/api-keys) * A **custom Character** your API key owns and is ready to use * An [ElevenLabs API key](https://elevenlabs.io/app/settings/api-keys) with ElevenAgents read permission * An [ElevenLabs agent](https://elevenlabs.io/app/agents/agents) with **Advanced → User input audio format → PCM 16000Hz** Set these server-side environment variables (see the [Next.js example](https://github.com/runwayml/avatars-sdk-react/tree/main/examples/nextjs-elevenlabs) for a full `.env.example`): ```bash RUNWAYML_API_SECRET=... RUNWAY_AVATAR_ID=... ELEVENLABS_API_KEY=... ELEVENLABS_AGENT_ID=... ``` ## Guide 1. **Install the Characters SDK** ```bash npm install @runwayml/avatars @runwayml/avatars-react ``` Server helpers such as `createElevenLabsSession` live in `@runwayml/avatars/api`. The React package re-exports them for convenience, but your API route should import from the core package. 2. **Create a server route** `createElevenLabsSession` from `@runwayml/avatars/api` fetches an [ElevenLabs signed URL](https://elevenlabs.io/docs/eleven-agents/customization/authentication), creates a Runway session with `integration: { type: "elevenlabs", signedUrl }`, polls until `READY`, and returns `sessionId`, `sessionKey`, `avatarId`, and `baseUrl` for `AvatarCall`. app/api/avatar/connect/route.ts ```ts // app/api/avatar/connect/route.ts import { createElevenLabsSession } from '@runwayml/avatars/api'; export async function POST() { const session = await createElevenLabsSession({ runwayApiSecret: process.env.RUNWAYML_API_SECRET!, avatarId: process.env.RUNWAY_AVATAR_ID!, elevenLabsApiKey: process.env.ELEVENLABS_API_KEY!, elevenLabsAgentId: process.env.ELEVENLABS_AGENT_ID!, }); return Response.json(session); } ``` Also exported from `@runwayml/avatars-react/api` if you already depend on the React package only. Without the SDK, run the same three steps manually: fetch the signed URL, create the session, poll until ready. See [Building your integration](/characters/integration) for session lifecycle patterns. 3. **Connect from the client** Pass the JSON from your connect route to `AvatarCall`: ```tsx 'use client'; import { AvatarCall } from '@runwayml/avatars-react'; import '@runwayml/avatars-react/styles.css'; export function Conversation({ sessionId, sessionKey, avatarId, baseUrl }) { return ( ); } ``` `createElevenLabsSession` echoes `avatarId` and `baseUrl` so you can forward the server response without rebuilding those fields. 4. **Test it** Trigger your connect route, then confirm Character video appears while your ElevenLabs agent responds. Mic audio goes Runway → worker → ElevenLabs; agent audio drives lip sync on the way back. Full working app: [Next.js + ElevenLabs example](https://github.com/runwayml/avatars-sdk-react/tree/main/examples/nextjs-elevenlabs). ## End sessions promptly Runway bills realtime Character sessions while the Character worker is active. End calls via `AvatarCall` `onEnd` and handle errors on your connect route so sessions are not left running. ## Troubleshooting | Symptom | Fix | | ---------------------------------------------- | ------------------------------------------------------------------------------------------------- | | `404 Could not find Avatar` | Use a Character ID scoped to the same API key (see [Custom Avatars](/characters/create-your-own)) | | `401` or inactive API key | Check your Runway API key in the [Developer Portal](https://dev.runwayml.com/settings/api-keys) | | Session stuck `NOT_READY` | Retry; confirm your environment has the ElevenLabs integration deployed | | Silent agent / no audio | Set **PCM 16000Hz** input format on the ElevenLabs agent | | `personality… cannot be used with integration` | Remove `personality`, `startScript`, and `tools` from the session create request | | ElevenLabs signed URL fails | Check `xi-api-key`, agent ID, and ElevenAgents read permission | See [Troubleshooting](/characters/troubleshooting) for general Characters SDK debugging. ## Learn more [Next.js + ElevenLabs example ](https://github.com/runwayml/avatars-sdk-react/tree/main/examples/nextjs-elevenlabs)Full working app with createElevenLabsSession and AvatarCall. [ElevenLabs agent authentication ](https://elevenlabs.io/docs/eleven-agents/customization/authentication)Signed URLs and server-side API key handling for ElevenLabs agents. [LiveKit Agents ](/characters/livekit)Bring your own agent via LiveKit instead of ElevenLabs. [Building your integration ](/characters/integration)Default Runway-owned sessions and custom React UI patterns. --- # Building your integration > Learn how to integrate Runway Avatars into your application with server-side session management and React components. This guide walks through building a complete Avatar integration using Next.js App Router. The same patterns apply to other React frameworks. Keep your API key secure Your `RUNWAYML_API_SECRET` must never be exposed to the client. Always create Sessions server-side. If your key is compromised, rotate it immediately in the [Developer Portal](https://dev.runwayml.com/settings/api-keys). ## Architecture overview Avatar Sessions require a server component to keep your API key secure. The client never sees your Runway API secret. ```plaintext ┌─────────────────┐ ┌─────────────────┐ ┌─────────────────┐ │ Client │ │ Your Server │ │ Runway API │ │ (React App) │ │ (Next.js) │ │ │ └────────┬────────┘ └────────┬────────┘ └────────┬────────┘ │ │ │ │ 1. Request Session │ │ │ POST /api/avatar/session │ │ │ ─────────────────────────►│ │ │ │ │ │ │ 2. Create Session │ │ │ POST /v1/realtime_sessions │ │ ─────────────────────────►│ │ │ │ │ │ 3. Poll until ready │ │ │ GET /v1/realtime_sessions/:id │ │ ─────────────────────────►│ │ │ │ │ │ 4. Consume credentials │ │ │ POST /v1/realtime_sessions/:id/consume │ │ ─────────────────────────►│ │ │ │ │ 5. Return credentials │◄───────────────────────── │ │◄───────────────────────── │ │ │ │ │ │ 6. WebRTC connection │ │ │ ─────────────────────────────────────────────────────►│ │ │ │ ``` ## Installation Install the Runway server SDK and React client: ```bash npm install @runwayml/sdk @runwayml/avatars-react ``` `@runwayml/avatars-react` includes the framework-agnostic core (`@runwayml/avatars`) automatically. ## Server setup Create an API route that handles Session creation. This endpoint receives an Avatar ID from the client, creates a Session with Runway, polls until it’s ready, consumes the credentials, and returns them to the client. The client can also pass optional `personality` and `startScript` fields to [override the Avatar’s defaults](/characters/concepts#per-call-overrides) for this session — useful for injecting user-specific context like the caller’s name. app/api/avatar/session/route.ts ```ts import RunwayML from '@runwayml/sdk'; const client = new RunwayML(); export async function POST(request: Request) { const { avatarId, personality, startScript } = await request.json(); // 1. Create session // To add tool calling, pass a tools array here — see /characters/tools const { id: sessionId } = await client.realtimeSessions.create({ model: 'gwm1_avatars', avatar: { type: 'custom', avatarId }, personality, startScript, }); // 2. Poll until ready let sessionKey: string | undefined; for (let i = 0; i < 60; i++) { const session = await client.realtimeSessions.retrieve(sessionId); if (session.status === 'READY') { sessionKey = session.sessionKey; break; } if (session.status === 'FAILED') { return Response.json({ error: session.failure }, { status: 500 }); } await new Promise(r => setTimeout(r, 1000)); } if (!sessionKey) { return Response.json({ error: 'Session timed out' }, { status: 504 }); } // 3. Consume session to get connection credentials const consumeResponse = await fetch( `${client.baseURL}/v1/realtime_sessions/${sessionId}/consume`, { method: 'POST', headers: { Authorization: `Bearer ${sessionKey}`, 'X-Runway-Version': '2024-11-06', }, } ); const credentials = await consumeResponse.json(); return Response.json({ sessionId, serverUrl: credentials.url, token: credentials.token, roomName: credentials.roomName, }); } ``` Set your API key as an environment variable: .env.local ```bash RUNWAYML_API_SECRET=your_api_key_here ``` ## Client integration ### Simple: AvatarCall The simplest way to add an Avatar is with the `AvatarCall` component. It handles WebRTC connection and renders a default UI. app/page.tsx ```tsx 'use client'; import { AvatarCall } from '@runwayml/avatars-react'; import '@runwayml/avatars-react/styles.css'; export default function Home() { return ( console.log('Call ended')} onError={(error) => console.error('Error:', error)} /> ); } ``` To use a custom Avatar created in the Developer Portal, replace `"customer-service"` with your Avatar ID. ### Webcam and screen sharing During a call, the Avatar can use **your webcam** and/or **your screen** as visual context—for example walkthroughs, slides, or showing something in frame. Enable that with [`@runwayml/avatars-react`](https://github.com/runwayml/avatars-sdk-react/blob/main/README.md); webcam and screen share are part of the **same realtime Session** as audio (the usual WebRTC call). Minimal example with the default control bar and screen sharing enabled: ```tsx // app/page.tsx — webcam (default) + optional screen share UI 'use client'; import { AvatarCall, AvatarVideo, ControlBar, ScreenShareVideo, } from '@runwayml/avatars-react'; import '@runwayml/avatars-react/styles.css'; export default function Home() { return ( ); } ``` ### Fully custom: hooks For complete control over the UI, use `AvatarSession` with hooks. This example shows how to build a custom interface with `useAvatarSession` for Session state and `useLocalMedia` for mic and webcam controls: components/CustomAvatarUI.tsx ```tsx 'use client'; import { AvatarSession, AvatarVideo, UserVideo, useAvatarSession, useLocalMedia, } from '@runwayml/avatars-react'; import type { SessionCredentials } from '@runwayml/avatars-react'; function CallUI() { const { state, end } = useAvatarSession(); const { isMicEnabled, toggleMic } = useLocalMedia(); return (
{state === 'connecting' &&
Connecting...
}
); } export function CustomAvatar({ credentials }: { credentials: SessionCredentials }) { return ( ); } ``` For more components, hooks, and examples—including the full **Webcam & Screen Sharing** section—see the [React SDK README](https://github.com/runwayml/avatars-sdk-react/blob/main/README.md). For **client tools** (UI tool calls) and **server tools** (server-side tools with return values), see [Tool calling](/characters/tools). ## Browser support The Avatars SDK uses WebRTC for real-time communication: | Browser | Minimum Version | | ------- | --------------- | | Chrome | 74+ | | Firefox | 78+ | | Safari | 14.1+ | | Edge | 79+ | Users must grant microphone permissions when prompted. Webcam access is required if the user’s video is enabled. *** ### Not using React? Most teams use **`@runwayml/avatars-react`** (above). If you are on Svelte, Vue, or plain HTML, use **`@runwayml/avatars`** — the same Session flow as this guide ([server setup](#server-setup)), without React. ```bash npm install @runwayml/sdk @runwayml/avatars ``` #### Quick start Your server route stays the same. In the browser, `streamTo` runs the consume call, joins the LiveKit room, and attaches avatar video to an element: ```javascript import { streamTo, AvatarEvent } from '@runwayml/avatars'; const credentials = await fetch('/api/avatar/session', { method: 'POST', headers: { 'Content-Type': 'application/json' }, body: JSON.stringify({ avatarId: 'music-superstar' }), }).then((r) => r.json()); const session = await streamTo({ credentials, target: document.getElementById('avatar'), }); session.on(AvatarEvent.Transcript, (entry) => { console.log(entry.role, entry.text); }); document.getElementById('mute')?.addEventListener('click', () => session.mic.toggle()); document.getElementById('end')?.addEventListener('click', () => session.end()); ``` Use **`connect({ credentials })`** when you want a headless session first, then **`session.streamTo(element)`** once you have a video target. #### Examples * [vanilla-js](https://github.com/runwayml/avatars-sdk-react/tree/main/examples/vanilla-js) — single HTML page + Express * [sveltekit](https://github.com/runwayml/avatars-sdk-react/tree/main/examples/sveltekit) — `streamTo` in a Svelte component Full API detail: [`@runwayml/avatars` README](https://github.com/runwayml/avatars-sdk-react/tree/main/packages/core). --- # LiveKit Agents > Use Runway Characters as the visual layer for your own LiveKit Agent. You own the conversational pipeline (STT, LLM, TTS) and Runway provides the lip-synced avatar video. Use Runway Characters with [LiveKit Agents](https://docs.livekit.io/agents/) to build fully custom conversational experiences where you control the entire pipeline. Your agent handles speech-to-text, language model, and text-to-speech. Runway provides the visual layer: audio in, avatar video out. ## Before you start You’ll need: * A [Runway API key](https://dev.runwayml.com/settings/api-keys) * A [LiveKit Cloud](https://cloud.livekit.io) project (or self-hosted LiveKit server) * A [Google Gemini API key](https://ai.google.dev/gemini-api/docs/api-key) (or another LLM/TTS provider) * A preset ID (e.g. `cat-character`) or custom Avatar ID from the [Developer Portal](https://dev.runwayml.com) ## Guide 1. **Install the plugin** * Python ```bash pip install livekit-plugins-runway ``` * Node ```bash npm install @livekit/agents-plugin-runway ``` Set the following in your `.env` file: ```bash RUNWAYML_API_SECRET=... LIVEKIT_URL=... LIVEKIT_API_KEY=... LIVEKIT_API_SECRET=... GOOGLE_API_KEY=... ``` 2. **Add AvatarSession to your agent** * Python agent\_worker.py ```python from dotenv import load_dotenv from livekit.agents import Agent, AgentServer, AgentSession, JobContext, cli from livekit.plugins import google, runway load_dotenv() server = AgentServer() @server.rtc_session() async def entrypoint(ctx: JobContext): session = AgentSession( llm=google.realtime.RealtimeModel(voice="kore"), ) avatar = runway.AvatarSession( preset_id="cat-character", ) await avatar.start(session, room=ctx.room) await session.start( agent=Agent(instructions="Talk to me!"), room=ctx.room, ) session.generate_reply(instructions="Say hello to the user.") if __name__ == "__main__": cli.run_app(server) ``` * Node agent\_worker.ts ```ts import { type JobContext, ServerOptions, cli, defineAgent, voice } from '@livekit/agents'; import * as google from '@livekit/agents-plugin-google'; import * as runway from '@livekit/agents-plugin-runway'; import { fileURLToPath } from 'node:url'; export default defineAgent({ entry: async (ctx: JobContext) => { await ctx.connect(); const session = new voice.AgentSession({ llm: new google.beta.realtime.RealtimeModel({ voice: 'Kore' }), }); const avatar = new runway.AvatarSession({ presetId: 'cat-character', }); await avatar.start(session, ctx.room); await session.start({ agent: new voice.Agent({ instructions: 'Talk to me!' }), room: ctx.room, outputOptions: { syncTranscription: false }, }); session.generateReply({ instructions: 'Say hello to the user.' }); }, }); cli.runApp(new ServerOptions({ agent: fileURLToPath(import.meta.url) })); ``` Use `avatar_id` / `avatarId` instead of `preset_id` / `presetId` to use a custom Character from the [Developer Portal](https://dev.runwayml.com). See the [LiveKit Runway plugin guide](https://docs.livekit.io/agents/models/avatar/plugins/runway/) for the full list of `AvatarSession` parameters. 3. **Test it** Open the [LiveKit Agents Playground](https://docs.livekit.io/agents/start/playground/) to preview your agent without building a frontend. Start a conversation and verify the avatar video track appears alongside your agent’s audio. ## End sessions promptly Runway bills realtime Character sessions while the Runway avatar worker is active. The plugin cancels the Runway realtime session during normal LiveKit job shutdown, so make sure your agent shutdown path runs when the user leaves, your agent disconnects, or your app ends the conversation. Set `max_duration` / `maxDuration` (seconds) in the `AvatarSession` constructor to cap session length. If the job is force-killed before cleanup runs, the Runway session can continue until this limit. ## Handle startup errors `AvatarSession.start()` can fail before the Character joins the LiveKit room, for example if the Runway project has insufficient credits or the session request is invalid. Catch startup errors in your agent and send an application-level message to your frontend so the user does not wait indefinitely for the avatar video track. * Python ```python try: await avatar.start(session, room=ctx.room) except Exception as exc: print(f"failed to start Runway avatar: {exc}") raise ``` * Node ```ts try { await avatar.start(session, ctx.room); } catch (error) { console.error('failed to start Runway avatar', error); throw error; } ``` ## Learn more [LiveKit Runway plugin guide ](https://docs.livekit.io/agents/models/avatar/plugins/runway/)LiveKit's integration guide for the Runway Characters plugin. [LiveKit Agents documentation ](https://docs.livekit.io/agents/)Full reference for the LiveKit Agents framework: models, plugins, room management, and deployment. [Agents Playground ](https://docs.livekit.io/agents/start/playground/)Test your agent in the browser without building a frontend. [Python plugin source ](https://github.com/livekit/agents/tree/main/livekit-plugins/livekit-plugins-runway)livekit-plugins-runway in the livekit/agents monorepo. [Node plugin source ](https://github.com/livekit/agents-js/tree/main/plugins/runway)@livekit/agents-plugin-runway in the livekit/agents-js monorepo. [ElevenLabs Agents ](/characters/elevenlabs)Bring your own ElevenLabs agent instead of a LiveKit agent. --- # Quickstart > Build a React app that video calls a Runway character in 5 minutes. In this tutorial, we will build a React web app that video calls a Runway character — in under 5 minutes. [Quickstart tutorial](https://www.youtube.com/embed/IRxGEaap4Wc) **Helpful links:** * [Runway Dev account](https://dev.runwayml.com) * [Runway avatar SDK template](https://github.com/runwayml/avatars-sdk-react/tree/main/examples/nextjs-simple) ### 1. Create a Runway Dev account Create an account at [dev.runwayml.com](https://dev.runwayml.com). ![Runway Dev login page](https://runway-static-assets.s3.us-east-1.amazonaws.com/devportal/avatars/quickstart/1.png) Once you log in, you will see a “Characters” tab at the top bar, and there are a few preset characters. We are going to video call the character called “Mina”. ![Characters tab showing Mina character](https://runway-static-assets.s3.us-east-1.amazonaws.com/devportal/avatars/quickstart/2.png) ### 2. Create a new API key Go to the **Manage** tab in the top bar, then click the **New API key** button in the top-right corner. ![Manage tab with New API key button](https://runway-static-assets.s3.us-east-1.amazonaws.com/devportal/avatars/quickstart/3.png) Give your key a name and copy it to a safe location. Once you close the pop-up, the key value is not available again. You can always create a new key if needed. ![API key name input](https://runway-static-assets.s3.us-east-1.amazonaws.com/devportal/avatars/quickstart/4.png) ![API key copy dialog](https://runway-static-assets.s3.us-east-1.amazonaws.com/devportal/avatars/quickstart/5.png) ### 3. Add credits Click on **Billing** in the left sidebar under the **Manage** tab, and add some credits to the account. ![Billing page](https://runway-static-assets.s3.us-east-1.amazonaws.com/devportal/avatars/quickstart/6.png) ![Adding credits](https://runway-static-assets.s3.us-east-1.amazonaws.com/devportal/avatars/quickstart/7.png) ### 4. Download the React app template In your terminal, run this command to copy the [template](https://github.com/runwayml/avatars-sdk-react/tree/main/examples/nextjs-simple) into your local directory: ```bash npx degit runwayml/avatars-sdk-react/examples/nextjs-simple my-avatar-app cd my-avatar-app ``` ### 5. Install packages Make sure you are using **Node.js 18+**, then install dependencies: ```bash npm install ``` ### 6. Set your API key Copy the `.env.example` file as `.env`, and paste your API key: ```plaintext RUNWAYML_API_SECRET=your_api_key_here ``` ### 7. Run the app ```bash npm run dev ``` The server starts at [http://localhost:3000](http://localhost:3000/). Click on the Mina character to start a conversation. ![Character selection screen](https://runway-static-assets.s3.us-east-1.amazonaws.com/devportal/avatars/quickstart/8.png) ![Active video call](https://runway-static-assets.s3.us-east-1.amazonaws.com/devportal/avatars/quickstart/9.png) ### Troubleshooting * **API key errors:** * Make sure you copy the entire API key correctly. The key begins with `key_` followed by 128 hex characters. * Make sure the key is currently active. Deactivated keys will be rejected. * **No credits:** Make sure your Runway Dev account has credits before starting a call. *** ### Next steps [Create Your Own Characters ](/characters/create-your-own)Create your own character from a single image — no training required. --- # Screen Sharing and Camera Feed > Share your webcam or screen with a Runway Character so it can see and respond to what is on camera in real time. Runway Characters can take a live **webcam** or **screen share** from your app. The Character sees that feed over the Session, understands what is visible, and responds in real time through Runway Dev — useful for demos, tutoring, games, and design feedback. The overview below shows how Runway Characters work in real time, including seeing the user’s webcam and shared screen. [Runway Characters — webcam and screen sharing demo](https://www.youtube.com/embed/xr0dtsaqxik?rel=0) If you build with the React SDK (`@runwayml/avatars-react`), webcam and screen sharing are built into `AvatarCall`, `ControlBar`, and related components. For the full list of props, hooks (such as `useLocalMedia`), and edge cases, see [**Webcam & screen sharing** in the React SDK README](https://github.com/runwayml/avatars-sdk-react#webcam--screen-sharing). ### Webcam and screen sharing Sharing video opens up visual workflows: identify objects on a desk, run trivia with physical cards ([example](https://x.com/technofantasyy/status/2031124673552097412)), get guidance while you play ([example](https://x.com/iamneubert/status/2031160102452081046)), walk through slides, or ask for reactions to a layout in your design tool. ### Webcam The webcam is on by default when you use the default UI. The `video` prop controls whether the camera starts when the Session connects; `` renders the local preview. Webcam enabled (default layout) ```tsx ``` To join without sending camera video, set `video={false}`: Disable webcam on connect ```tsx ``` ### Screen sharing Pass `showScreenShare` to `ControlBar` so users can start sharing from the built-in controls, and add `` to show the shared content in your layout. Screen share control and preview ```tsx ``` While sharing, the default `ControlBar` shows a banner with a quick **Stop** action. #### Start sharing before the Session connects If you want the browser’s screen-share permission prompt **before** the call connects, capture a `MediaStream` first and pass it as `initialScreenStream`: Pre-captured display media stream ```tsx import { useState } from 'react'; import { AvatarCall, AvatarVideo, ControlBar, ScreenShareVideo } from '@runwayml/avatars-react'; function ScreenShareCall() { const [stream, setStream] = useState(null); async function startWithScreenShare() { const mediaStream = await navigator.mediaDevices.getDisplayMedia({ video: true }); setStream(mediaStream); } if (!stream) { return ; } return ( ); } ``` For programmatic toggles (camera, mic, screen share) inside a Session, use the `useLocalMedia` hook — documented in the [same README section](https://github.com/runwayml/avatars-sdk-react#webcam--screen-sharing). *** ### Next steps [Building your integration ](/characters/integration)Session creation, server routes, and wiring AvatarCall in a real app. [React SDK on GitHub ](https://github.com/runwayml/avatars-sdk-react)Examples, hooks reference, and changelog for @runwayml/avatars-react. --- # Tool calling overview > Let your Character invoke tools during a session — triggering client-side UI, fetching server-side data, or interacting with your page. Tool calling lets the model decide when to invoke a named function during a realtime session. Your Character can trigger UI changes, look up live data, or click elements on the page — making it capable of taking actions, not just speaking. ## How it works 1. **User speaks** “What’s the status of my order 12345?” 2. **Model analyzes intent** The LLM analyzes the request and determines it needs external information to respond accurately. 3. **Tool invocation** The model selects the appropriate tool and generates a structured function call: ```json { "name": "check_order_status", "arguments": { "order_id": "12345" } } ``` 4. **Tool execution** The system executes the tool based on its type: * **Client tools:** your frontend handler runs (e.g. showing a UI overlay) * **Server tools:** an HTTP-style request hits your server, which returns a result 5. **Response integration** The tool result is returned to the model, which incorporates it into a natural response. ## Tool types Runway Characters support two types of tools, each designed for different use cases. You can combine both in the same session. [Client tools ](/characters/tools/client-tools)Tools executed in the browser to drive your UI — overlays, navigation, and page interactions. [Server tools ](/characters/tools/server-tools)Tools executed on your server whose results feed back into the conversation. --- # Best practices > Writing effective descriptions, parameter schemas, and prompting tips for reliable tool calls. Tips for writing reliable tool definitions, staying within limits, and debugging when things go wrong. ## Writing effective descriptions The `description` field on both tools and parameters is how the model decides **when** to invoke a tool and **what arguments** to pass. Vague descriptions lead to missed or incorrect invocations. **Be specific about when the tool should be used:** ```ts // ✅ Good — the model knows exactly when to call this { name: 'check_order_status', description: 'Look up a customer order by ID when the user asks about delivery, tracking, or order updates. Returns the current status and estimated arrival date.', } // ❌ Bad — too vague for reliable invocation { name: 'check_order_status', description: 'Checks orders', } ``` **Be specific about parameter formats:** ```ts // ✅ Good — tells the model what to extract from conversation { type: 'string', name: 'order_id', description: 'The order ID mentioned by the user, typically in the format ORD-12345', } // ❌ Bad — leaves the model guessing { type: 'string', name: 'id', description: 'The ID', } ``` ### Use personality to guide invocation Your Character’s `personality` field can include instructions about when and how to use tools. This is especially useful when the Character has multiple tools and you want predictable behavior: ```ts await client.realtimeSessions.create({ model: 'gwm1_avatars', avatar: { type: 'custom', avatarId }, personality: `You are a helpful shopping assistant. When the user asks about an order, use check_order_status to look up the details before answering. When the user asks about products, use search_catalog to find relevant items. Always confirm the order ID before looking it up.`, tools: [/* ... */], }); ``` ## Parameter schema reference Tools accept a `parameters` array where each entry describes one argument. Six types are supported: ### Basic types | Type | Description | Example value | | --------- | -------------- | ------------- | | `string` | Text value | `"ORD-12345"` | | `integer` | Whole number | `42` | | `number` | Decimal number | `3.14` | | `boolean` | True/false | `true` | Each parameter requires a `type`, `name`, and `description`. Set `required: false` to make a parameter optional (defaults to `true`). See the [API reference](/api-reference) for the full schema. ### String with enum String parameters can include an `enum` to restrict values: ```ts { type: 'string', name: 'priority', description: 'Urgency level for the support ticket', enum: ['low', 'medium', 'high', 'critical'], } ``` ### Array Array parameters specify the type of each element: ```ts { type: 'array', name: 'tags', description: 'Keywords to tag the support ticket with', items: { type: 'string' }, } ``` Array items can be `string`, `integer`, `number`, or `boolean`. ### Object Object parameters define nested properties — each one follows the same schema as a top-level parameter: ```ts { type: 'object', name: 'address', description: 'Shipping address for the order', properties: [ { type: 'string', name: 'street', description: 'Street address' }, { type: 'string', name: 'city', description: 'City name' }, { type: 'string', name: 'zip', description: 'ZIP or postal code' }, ], } ``` ### Complete example Here’s a tool with a mix of parameter types: ```ts { type: 'backend_rpc', name: 'create_support_ticket', description: 'Create a support ticket when the user reports a problem. Collect the issue details and priority before calling.', timeoutSeconds: 6, parameters: [ { type: 'string', name: 'subject', description: 'A short summary of the issue', }, { type: 'string', name: 'priority', description: 'Urgency level', enum: ['low', 'medium', 'high'], }, { type: 'array', name: 'tags', description: 'Keywords to categorize the ticket', items: { type: 'string' }, }, { type: 'boolean', name: 'notify_customer', description: 'Whether to send a confirmation email to the user', required: false, }, ], } ``` ## Related [Client tools ](/characters/tools/client-tools)Fire-and-forget tools that drive your UI — modals, navigation, and Page Actions. [Server tools ](/characters/tools/server-tools)Tools executed on your server whose results feed back into the conversation. --- # Client tools > Fire-and-forget tool calls that drive your UI — modals, overlays, navigation, and pre-built Page Actions. Enable your Character to trigger actions and control your application’s user interface — opening modals, updating state, navigating pages, and more. Great for info panels, trivia boards, highlights, game state, or any on-device effect that doesn’t need a server round trip. Unlike [server tools](/characters/tools/server-tools), client tools run entirely in the browser and don’t return results to the conversation. If you need the Character to speak from data your server provides, use [server tools](/characters/tools/server-tools) instead. ## Guide 1. **Define your tools** Use `clientTool` from `@runwayml/avatars-react/api` to define tools. Each tool needs a name, description, and a [Standard Schema](https://standardschema.dev/) (like Zod) for its arguments. ```ts // lib/tools.ts — shared between server and client import { clientTool, type ClientEventsFrom } from '@runwayml/avatars-react/api'; import { z } from 'zod'; export const openModalTool = clientTool('open_modal', { description: 'Open a modal dialog to display additional information', schema: z.object({ title: z.string(), content: z.string(), }), }); export const navigateToPageTool = clientTool('navigate_to_page', { description: 'Navigate the user to a specific page in the application', schema: z.object({ page: z.string() }), }); export const tools = [openModalTool, navigateToPageTool]; export type AppEvents = ClientEventsFrom; ``` When you pass a schema, `useClientEvent` validates incoming args at runtime — malformed events are dropped instead of crashing your UI. 2. **Pass tools at session creation** On your server, pass the tools array when creating the Session: app/api/avatar/session/route.ts ```ts import RunwayML from '@runwayml/sdk'; import { tools } from '@/lib/tools'; const client = new RunwayML(); export async function POST(request: Request) { const { avatarId } = await request.json(); const { id: sessionId } = await client.realtimeSessions.create({ model: 'gwm1_avatars', avatar: { type: 'custom', avatarId }, tools, }); // Poll and return credentials (see Building your integration) // ... } ``` 3. **Handle events on the client** Inside an `AvatarCall`, `AvatarProvider`, or `AvatarSession`, use hooks to handle incoming tool calls. **Single tool** — `useClientEvent` takes a tool definition and a callback: ```tsx import * as React from 'react'; import { useClientEvent } from '@runwayml/avatars-react'; import { openModalTool } from '@/lib/tools'; function ModalHandler() { const [modal, setModal] = React.useState<{ title: string; content: string } | null>(null); const handleOpenModal = React.useCallback((args: { title: string; content: string }) => { setModal(args); }, []); useClientEvent(openModalTool, handleOpenModal); if (!modal) return null; return (

{modal.title}

{modal.content}

); } ``` **All tools** — `useClientEvents` fires a callback for every tool call: ```tsx import { useClientEvents } from '@runwayml/avatars-react'; import type { AppEvents } from '@/lib/tools'; function EventLogger() { useClientEvents((event) => { console.log('Tool called:', event.tool, event.args); }); return null; } ``` 4. **Test it** Start a conversation and say something like “Tell me more about the premium plan.” You should see a modal appear with the plan details while the Character continues speaking. ## Page Actions The SDK ships with pre-built tools that let the Character interact with your page — clicking buttons, scrolling to sections, and highlighting elements. No custom tool definitions needed. ### Server setup Import `pageActionTools` and pass them when creating the Session: ```ts import { pageActionTools } from '@runwayml/avatars-react/api'; const { id } = await client.realtimeSessions.create({ model: 'gwm1_avatars', avatar: { type: 'runway-preset', presetId: 'music-superstar' }, tools: pageActionTools, }); ``` Combine with your own tools by spreading both arrays: ```ts import { pageActionTools } from '@runwayml/avatars-react/api'; import { tools as clientEventTools } from '@/lib/tools'; tools: [...pageActionTools, ...clientEventTools], ``` ### Client setup Drop in the `PageActions` component inside your `AvatarCall`: ```tsx import { AvatarCall, AvatarVideo, ControlBar, PageActions } from '@runwayml/avatars-react'; function App() { return ( ); } ``` The Character can now reference elements by `id` or by a `data-avatar-target` attribute: ```html
...
``` ### Available actions | Action | What it does | | ----------- | ---------------------------------------------------- | | `click` | Calls `.click()` on the target element | | `scroll_to` | Scrolls the target into view with smooth scrolling | | `highlight` | Pulses an outline around the target, then removes it | For styling, configuration, and advanced usage, see the [`PageActions` documentation](https://github.com/runwayml/avatars-sdk-react#pageactions) in the SDK repo. ## Next steps [Server tools ](/characters/tools/server-tools)Tools executed on your server whose results feed back into the conversation. [Best practices ](/characters/tools/best-practices)Parameter schemas, limits, and prompting tips for reliable tool calls. [Example: Client events ](https://github.com/runwayml/avatars-sdk-react/tree/main/examples/nextjs-client-events)Build a trivia game with client event tools. [SDK reference ](https://github.com/runwayml/avatars-sdk-react)Complete SDK documentation for tool events and hooks. --- # Reference > Limits, tool call history via the Conversations API, and troubleshooting. ## Limits | Resource | Limit | | -------------------------------- | ------------------------------- | | Tools per session | 20 | | Parameters per tool | 20 | | Tool name length | 1–64 characters | | Tool name pattern | `^[a-zA-Z_][a-zA-Z0-9_]*$` | | Tool names | Must be unique within a session | | Description length | 1–1024 characters | | Enum values per string parameter | 20 | | Enum value length | 64 characters | | Nested properties per object | 20 | | Backend RPC timeout | 1–8 seconds (default 4) | | Backend RPC handlers per session | 1 | ## Reading tool call history After a session ends, you can read back tool call history from the [Conversations API](/api-reference#tag/avatar-conversations). The list endpoint includes a `hasTools` flag on each conversation: ```bash curl https://api.dev.runwayml.com/v1/avatar_conversations \ -H "Authorization: Bearer $RUNWAYML_API_SECRET" \ -H "X-Runway-Version: 2024-11-06" ``` The detail endpoint includes the full transcript with tool calls and results: ```bash curl https://api.dev.runwayml.com/v1/avatar_conversations/conv_123 \ -H "Authorization: Bearer $RUNWAYML_API_SECRET" \ -H "X-Runway-Version: 2024-11-06" ``` The response includes: * **`tools`** — the tools that were configured for the session (type, name, description) * **`transcript`** — each entry can include: * `toolCalls` — tool invocations on assistant turns: `{ id, name, arguments }` * `toolResults` — results returned: `{ id, name, result, error, durationMs }` * `content` — can be `null` for tool-only turns where the Character didn’t speak Example transcript entry with a tool call: ```json { "role": "assistant", "content": null, "timestamp": "2025-01-15T10:30:00Z", "toolCalls": [ { "id": "call_abc123", "name": "check_order_status", "arguments": { "order_id": "ORD-12345" } } ], "toolResults": [ { "id": "call_abc123", "name": "check_order_status", "result": { "status": "shipped", "eta": "2025-01-17" }, "error": null, "durationMs": 230 } ] } ``` ## Troubleshooting --- # Server tools > Server-side tool calls whose return values feed back into the conversation, letting the Character speak from real data. Connect your Character to external data and systems. Server tools let the Character fetch live data, call APIs, and query databases — with results that feed back into the conversation so it can speak from real information. Unlike [client tools](/characters/tools/client-tools), server tools return results to the LLM. Use them when you need server-side auth, database lookups, or any data that shapes what the Character says next. ## Guide 1. **Declare tools at session creation** On your server, declare `backend_rpc` tools when creating the Session: ```ts import RunwayML from '@runwayml/sdk'; const client = new RunwayML(); const { id: sessionId } = await client.realtimeSessions.create({ model: 'gwm1_avatars', avatar: { type: 'custom', avatarId: 'your-avatar-id' }, tools: [ { type: 'backend_rpc', name: 'check_order_status', description: 'Look up a customer order by ID and return the current shipping status', timeoutSeconds: 6, parameters: [ { type: 'string', name: 'order_id', description: 'The order ID, e.g. ORD-12345', }, ], }, ], }); ``` 2. **Set up the RPC handler** Connect the RPC handler using [`@runwayml/avatars-node-rpc`](https://github.com/runwayml/avatars-node-rpc). Pass your API key and session ID — the package calls `/connect_backend` and joins the room automatically: ```ts import { createRpcHandler } from '@runwayml/avatars-node-rpc'; const handler = await createRpcHandler({ apiKey: process.env.RUNWAYML_API_SECRET!, sessionId, tools: { check_order_status: async (args) => { const order = await db.orders.find(String(args.order_id)); return { status: order.status, eta: order.eta }; }, }, onConnected: () => console.log('Connected to session'), onDisconnected: () => console.log('Session ended'), onError: (err) => console.error('RPC error:', err), }); ``` If you’ve already called `/connect_backend` yourself, pass pre-fetched credentials instead: ```ts const handler = await createRpcHandler({ credentials: { url: 'wss://livekit.example.com', token: '', roomName: '', }, tools: { check_order_status: async (args) => { const order = await db.orders.find(String(args.order_id)); return { status: order.status, eta: order.eta }; }, }, }); ``` 3. **Test it** Start a conversation and ask something like “What’s the status of my order 12345?” Your handler should fire, and the Character will respond with the returned data: “Your order has shipped! It should arrive by May 7th.” For the full list of handler options, see the [`@runwayml/avatars-node-rpc` README](https://github.com/runwayml/avatars-node-rpc#api). ## Timeout Server tools accept a `timeoutSeconds` field that controls how long the Character waits for your handler to respond. | Setting | Value | | ------- | ------------- | | Default | **4 seconds** | | Minimum | 1 second | | Maximum | 8 seconds | If your handler doesn’t respond within the timeout, the tool call is treated as failed and the Character continues the conversation without the result. Choose a timeout that covers your expected handler latency with a small buffer. If your backend needs to make external API calls, consider increasing from the default: ```ts { type: 'backend_rpc', name: 'fetch_weather', description: 'Get current weather for a city', timeoutSeconds: 8, parameters: [ { type: 'string', name: 'city', description: 'City name' }, ], } ``` ## Error handling If a tool handler **throws an error**, the error message is sent back to the worker so the model can acknowledge the failure instead of hanging until timeout: ```ts tools: { check_order_status: async (args) => { const order = await db.orders.find(String(args.order_id)); if (!order) { throw new Error('Order not found'); } return { status: order.status, eta: order.eta }; }, }, ``` Other things to know: * **One handler per session** — the API enforces a single backend RPC connection per Session. Attempting a second `/connect_backend` call will be rejected. * **Disconnect handling** — if the handler disconnects mid-session, pending RPC calls will time out. Use the `onDisconnected` callback to detect this. ## Combining with client events You can use both server tools and [client tools](/characters/tools/client-tools) in the same Session. Declare both tool types in the `tools` array: ```ts import { openModalTool } from '@/lib/tools'; await client.realtimeSessions.create({ model: 'gwm1_avatars', avatar: { type: 'custom', avatarId }, tools: [ openModalTool, { type: 'backend_rpc', name: 'check_order_status', description: 'Look up a customer order', parameters: [ { type: 'string', name: 'order_id', description: 'The order ID' }, ], }, ], }); ``` On the client, subscribe to client events as usual. On the server, connect the RPC handler for the backend tools. ## Next steps [Client tools ](/characters/tools/client-tools)Fire-and-forget tools that drive your UI — modals, navigation, and Page Actions. [Best practices ](/characters/tools/best-practices)Parameter schemas, limits, and prompting tips for reliable tool calls. [Example: RPC weather ](https://github.com/runwayml/avatars-sdk-react/tree/main/examples/nextjs-rpc-weather)Weather assistant using backend RPC tools. [SDK reference ](https://github.com/runwayml/avatars-node-rpc)Complete documentation for the Node RPC handler. --- # Troubleshooting > Debugging tips for Runway Avatars integrations. ## Debugging tips ### Enable verbose logging Add error handlers to capture detailed information: ```tsx { console.error('Avatar error:', error); console.error('Error name:', error.name); console.error('Error message:', error.message); if (error.cause) { console.error('Cause:', error.cause); } }} /> ``` ### Check Session state Use the `useAvatarSession` hook to monitor connection state: ```tsx import { useAvatarSession } from '@runwayml/avatars-react'; function DebugInfo() { const { state, sessionId, error } = useAvatarSession(); return (
      {JSON.stringify({ state, sessionId, error: error?.message }, null, 2)}
    
); } ``` ### Test with minimal setup Isolate issues by testing with the simplest possible configuration. **React:** ```bash npx degit runwayml/avatars-sdk-react/examples/nextjs-simple test-app cd test-app npm install # Add your API key to .env npm run dev ``` **Not using React:** ```bash npx degit runwayml/avatars-sdk-react/examples/vanilla-js test-app cd test-app npm install # Add your API key to .env npm run dev ``` See also [Not using React?](/characters/integration#not-using-react) on the integration guide. If the example works but your integration doesn’t, compare the implementations to find differences. ### Webcam, screen share, and permissions Webcam and screen capture need a [secure context](https://developer.mozilla.org/en-US/docs/Web/Security/Secure_Contexts) (HTTPS or `localhost`). On plain HTTP (except `localhost`), the browser may not offer camera or display capture at all. For component options and examples, see the [Webcam & Screen Sharing](https://github.com/runwayml/avatars-sdk-react/blob/main/README.md#webcam--screen-sharing) section of the React SDK README and the [integration guide](/characters/integration#webcam-and-screen-sharing). ## Getting help | Resource | Description | | --------------------------------------------------------------- | ----------------------------------------------- | | [Developer Portal](https://dev.runwayml.com/) | Manage Avatars, view logs, access dashboard | | [SDK Repository](https://github.com/runwayml/avatars-sdk-react) | Report bugs, view examples, check releases | | Account Support | Contact your Runway account manager for support | When reporting issues, include: * Browser and version * SDK version (`npm list @runwayml/avatars-react` or `npm list @runwayml/avatars`) * Error messages from browser console * Session ID (if available) * Steps to reproduce --- # How to Invite a Runway Character to a Meeting > Invite a Runway Character to any Zoom, Google Meet, or Microsoft Teams call — it joins as a live participant with real-time video and audio. Invite a Runway Character to any Zoom, Google Meet, or Microsoft Teams meeting. The Character joins as a regular participant — it can see and hear other attendees and responds in real time with lip-synced video and natural audio. The whole setup takes about 60 seconds. [How to invite a Runway Character to a meeting](https://www.youtube.com/embed/IAY6MYxz0KU?rel=0) **Helpful links:** * [Runway Characters Meet Web App](https://runway-characters-meet-production.up.railway.app/) * [Developer Portal](https://dev.runwayml.com) * [Source Code](https://github.com/runwayml/runway-characters-meet) ### Step 1 — Get your API key Go to [dev.runwayml.com](https://dev.runwayml.com) and sign up. Every new account includes 600 free credits — roughly 30 minutes of Character video. Once you’re logged in: 1. Click the **Manage** tab in the top bar. ![Manage tab with New API key button](https://runway-static-assets.s3.us-east-1.amazonaws.com/devportal/avatars/quickstart/3.png) 2. Click **New API Key** in the top-right corner. 3. Copy the key. ![API key name input](https://runway-static-assets.s3.us-east-1.amazonaws.com/devportal/avatars/quickstart/4.png) ![API key copy dialog](https://runway-static-assets.s3.us-east-1.amazonaws.com/devportal/avatars/quickstart/5.png) Back in the [Runway Characters Meet web app](https://runway-characters-meet-production.up.railway.app/), paste your API key. It’s saved in your browser and only used to communicate with Runway Dev. ![API key copy paste](https://runway-static-assets.s3.us-east-1.amazonaws.com/calliope-demo/meet-tutorial/1.png) ### Step 2 — Add a meeting link Open Zoom, Google Meet, or Microsoft Teams and start or join a call. Copy the meeting invite URL and paste it into the Runway Characters Meet web app. Any standard meeting link works — the app supports all three platforms. ![Meeting URL](https://runway-static-assets.s3.us-east-1.amazonaws.com/calliope-demo/meet-tutorial/2.png) ### Step 3 — Pick a Character Choose a Character from the preset dropdown. There are several to try — for example, the cat Character. You can also use a custom Character: 1. Go to the [Developer Portal](https://dev.runwayml.com) and click **Characters**. 2. Create a Character by uploading an image, choosing a voice, and writing a personality prompt. 3. Copy the **Character ID**. 4. Back in the Runway Characters Meet web app, switch to **Custom** and paste the Character ID. ![custom avatar](https://runway-static-assets.s3.us-east-1.amazonaws.com/calliope-demo/meet-tutorial/5.png) Sample system prompt ```text You are Lydia Marin, a new Member of Technical Staff on the Product team at Runway. This is your first week and you're at your first all-hands meeting. You're a little nervous — you don't want to talk too much or interrupt. IMPORTANT: Do NOT introduce yourself or give your background unless someone specifically asks you to, calls your name, or says something like "Lydia, want to introduce yourself?" or "let's hear from the new hires." Until then, just listen quietly. If someone says hi or welcomes you, just say something brief like "Thanks! Happy to be here" or "Hey! Yeah, excited to be here." Keep it short. When someone DOES ask you to introduce yourself, say something like: "Hi everyone! Super excited to be joining Runway as a Member of Technical Staff on the product engineering team. Before this I was at a startup in Barcelona building collaborative design tools — lots of real-time web stuff, WebSockets, canvas rendering, that kind of thing. I studied CS at Universitat Politècnica de Catalunya and did a stint at Figma in San Francisco before moving back to Europe. I just relocated to New York for this role, which has been a big adjustment — I miss the weather already. Fun fact — I'm a huge home cook, I make my own pasta from scratch almost every weekend, and I'm trying to perfect cacio e pepe. I also have way too many houseplants for a New York apartment. Looking forward to meeting everyone!" When someone speaks to you, acknowledge them by name. You can see each participant's name displayed in the meeting view. Use their name naturally in your response, e.g. "Great question, Sarah" or "Thanks for asking, Mike." ``` ### Step 4 — Send the Character Click **Send Character to Meeting**. The session panel shows the connection progress: 1. Creating Runway session… 2. Waiting for Character to be ready… 3. Bot joining meeting… 4. **Character is live!** This typically takes about 5 seconds. ![send meeting](https://runway-static-assets.s3.us-east-1.amazonaws.com/calliope-demo/meet-tutorial/3.png) ### Step 5 — Interact with the Character Switch to your meeting window. The Character appears as a regular participant — it can: * **See** the video feed and read on-screen names * **Hear** everything said in the meeting * **Respond** in real time with lip-synced video, natural speech, gestures, and expressions ![zoom meeting with cat character](https://runway-static-assets.s3.us-east-1.amazonaws.com/calliope-demo/meet-tutorial/4.jpg) From the Runway Characters Meet control panel you can **mute** the Character or **end the session** at any time. Ending the session removes the Character from the meeting. ### What it looks like In the demo, the custom Character “Lydia” joins a Zoom meeting and introduces herself — sharing her background, mentioning previous work experience, and answering follow-up questions from other participants, all in real time. The Character can also read participant names from the meeting UI and address people directly. ![zoom meeting with lydia character](https://runway-static-assets.s3.us-east-1.amazonaws.com/calliope-demo/meet-tutorial/6.jpg) ![google meeting](https://runway-static-assets.s3.us-east-1.amazonaws.com/calliope-demo/meet-tutorial/7.jpg) ### Supported platforms | Platform | Status | | --------------- | --------- | | Zoom | Supported | | Google Meet | Supported | | Microsoft Teams | Supported | ### Try it yourself | Resource | Link | | ------------------------------ | ------------------------------------------------------------------------------------------------------------- | | Runway Characters Meet web app | [runway-characters-meet-production.up.railway.app](https://runway-characters-meet-production.up.railway.app/) | | API key signup | [dev.runwayml.com](https://dev.runwayml.com) | | Custom Characters | [Create your own](/characters/create-your-own) | | Source code | [github.com/runwayml/runway-characters-meet](https://github.com/runwayml/runway-characters-meet) | If you’d like to build your own app to invite Characters to meetings, check out the README in the [runway-characters-meet](https://github.com/runwayml/runway-characters-meet) repository. *** ### Next steps [Create your own Character ](/characters/create-your-own)Upload an image, pick a voice, and write a personality to build a custom Character for your meetings. --- # Embedded Widget > Add a Runway Character to any website with a single script tag — no server, no API key on the client, no React required. The embedded widget is the simplest way to put a Runway Character on your website. Drop a single script tag into your HTML and your visitors can start a video conversation — no backend, no React, no API key management on the client. [Embed a Character on your website](https://www.youtube.com/embed/k-a7wBVYQrw?rel=0) **Helpful links:** * [Developer Portal](https://dev.runwayml.com) ## When to use the widget | | Widget | [React SDK](/characters/integration) | | ------------------- | ------------------------- | ------------------------------------ | | **Setup** | One script tag | Server route + React | | **Server required** | No | Yes | | **Customization** | Portal config | Full programmatic control | | **Best for** | Marketing & support pages | Custom apps, integrations | Use the widget when you want the lowest-effort integration. Use the [React SDK](/characters/integration) when you need full control over the UI and session lifecycle. Public-facing The widget runs entirely in the browser — there is no server-side API key involved. The **domain allowlist** is the primary security boundary. Only enable the widget for Characters you intend to be publicly accessible. ## Setup ### 1. Open your Character Go to the [Developer Portal](https://dev.runwayml.com/) and click into the Character you want to embed. ![Character detail page in the Developer Portal](https://runway-static-assets.s3.us-east-1.amazonaws.com/devportal/avatars/widget/1-character-detail.webp) ### 2. Configure the Embed tab Navigate to the **Embed** tab. Add at least one allowed origin (e.g. `http://localhost:3000` for local development), then adjust limits and styling to suit your site. See [Configuration](#configuration) below for details on each setting. ![Embed tab showing the embed code snippet, allowed origins, and interface settings](https://runway-static-assets.s3.us-east-1.amazonaws.com/devportal/avatars/widget/2-embed-tab-top.webp) ### 3. Preview and copy the embed code Use the **Preview** to check your changes, then copy the script tag shown at the top of the page. ![Widget preview with the launcher visible in the bottom-right corner](https://runway-static-assets.s3.us-east-1.amazonaws.com/devportal/avatars/widget/5-preview.webp) ### 4. Add the script tag to your site Paste the snippet into your site’s HTML, before the closing `` tag: ```html ``` That’s it — reload the page and the widget launcher appears in the corner. Your visitors can click it to start a conversation with your Character. ## Configuration All configuration is managed through the **Embed** tab in the Developer Portal. ### Allowed origins The widget only loads on origins you explicitly allow. Add your production domain (and any staging/preview domains) in the **Allowed origins** section. Requests from unlisted origins are rejected. ### Limits | Setting | Description | | ---------------- | ------------------------------------------------ | | **Max Duration** | Maximum session length in seconds (default: 120) | | **Max Daily** | Maximum number of calls per day | ### Interface Customize the widget’s look and feel to match your brand: * **Icon** — use the default icon or upload a custom image * **Label** — toggle a text label next to the icon (e.g. “Need help?”) * **Colors** — set icon/label color, background color, CTA colors * **CTA copy** — customize the call-to-action text (e.g. “Ask anything”) * **Layout** — choose between compact and full expanded views, and whether the widget starts expanded * **Video call** — choose between circle and full video call shapes * **Placement** — position the widget (e.g. bottom right) ### Options * **Share screen automatically** — when enabled, the visitor’s screen is shared with the Character automatically when a call starts ## Troubleshooting * **Widget not loading:** Make sure the page’s origin is in the **Allowed origins** list. The origin must match exactly, including protocol and port. * **Script tag placement:** The `